Skip to content
PPF WERK

Advice & installation of the protective film

Everything you need to know before ordering and for a clean installation of your PPF WERK protective film.

Advice & application on film

Check the surface, measure it, apply the film in five steps – and how to care for it and remove it.

Brand film · 18 s
Part 1

Before ordering

Does the film suit your surface, which cut, which dimensions.
01

Is your surface suitable?

The film’s adhesive is an acrylic adhesive. It only bonds across the whole surface if that surface is smooth and sealed – then the film stays invisible and can be removed again later. Open pores, oil, wax or a coarse texture leave no continuous bonding surface: the film does not hold evenly, edges lift.

Suitable

  • Painted woodPainted fronts, painted table tops, piano lacquerThe film holds on sealed, fully cured lacquer. Let freshly lacquered surfaces cure for at least four weeks.
  • Laminated and coated woodKitchen fronts, melamine and laminate boards, furniture boardsSmooth, sealed coating – the normal case for kitchens and furniture.
  • Glass and ceramicsGlass tables, display cases, tiled splashbacks, glass panelsClean grease-free before applying; glass is unforgiving of dust under the film.
  • MetalStainless steel, painted and anodised sheetsSmooth, sealed surface. Brushed stainless steel remains visible under the film.
  • Smooth plasticsAcrylic glass, smooth plastic panels, displaysSmooth and sealed. For soft or rubberised plastics, test in a hidden spot first.
  • Automotive paintLoading sill, door sills, door edges, interior trimFully cured factory paint or fully cured repaint.

Check first

  • Freshly paintedPaint less than four weeks oldLet it cure, otherwise the adhesive can leave marks in the paint. Ask if unsure.
  • Lightly textured surfacesFine wood embossing, soft-touch, fine linen patternWhether the adhesive holds across the surface depends on the texture – we test that on a sample.
  • Unknown materialNot sure what the surface isA photo and a short description are enough – we will tell you whether and which film fits.

Not suitable

  • Oiled or waxed woodOiled solid wood tables, waxed frontsOil and wax prevent adhesion. The film comes off – we generally advise against it.
  • Open-pored, untreated woodRaw wood, coarsely brushed oakThe adhesive finds no sealed surface and does not hold across it.
  • Heavily textured or rough surfacesRough plaster, coarse natural stone, textiles, corkThe film cannot follow the texture; air channels remain and the edges lift.

Not sure about the material?

Test first. On unknown, delicate or slightly textured surfaces, apply the film to an inconspicuous spot first or test it with a material sample before covering the whole surface. Freshly painted surfaces need at least four weeks of curing beforehand – otherwise the adhesive can leave marks in the paint.

Send us a photo of the whole surface, a detail of surface and edge and, as far as known, material and treatment. We help with the assessment based on pictures and details. If the material cannot be determined reliably from the photo, we test the adhesion on a sample on your surface.

And which film? Three questions – surface, look, use – and the assistant names the film. If the material is unsuitable or unclear, it says so. Start the assistant · Compare films

02

Cutting option and allowance

Both options start from the same dimensions. The difference is who cuts the contour – and whether you need an allowance.

Film as a rectangle, contour to cut yourself dashed

Cut it yourself

No surcharge

You receive the film in the entered size from the roll and trim it yourself with a knife – at edges, in radii, around cut-outs. The cheaper option if you are fitting on site anyway.

Film cut to the contour, ready

Exactly to size

+ €9.90 per piece

We cut the shape with exactly the dimensions you entered – including circles, radii and free forms. The film arrives ready to lay on; the surcharge applies per piece.

  • For “Exactly to size” the entered dimensions are the final dimensions – measure precisely and add nothing. For “Cut it yourself” add about a centimetre of allowance all round, which you trim at the edge after applying.
03

How to measure your surface

The names of the dimensions are the same as in the configurator – width, length, diameter, corner radius. What you measure here, you enter there one to one.

The cut is the plan view of your surface

We cut flat: the cut reproduces the contour of your surface seen from above – for tables, fronts, panels and vehicle surfaces alike. A rounded table edge in cross-section does not belong in the corner radius; that only describes the rounding in plan view.

  1. 1Measure the surface the film is to cover – not the piece of furniture around it.
  2. 2You enter width, length and diameter in centimetres, to the millimetre (1 m = 100 cm = 1000 mm). Only the corner radius is given in millimetres.
  3. 3Measure at several points – furniture is rarely square to the millimetre. For “Exactly to size” take the smaller dimension so nothing overhangs.
  4. 4Width is the dimension at the top of the configurator preview, length the one on the right – exactly as in the drawings here.

The shapes and their dimensions

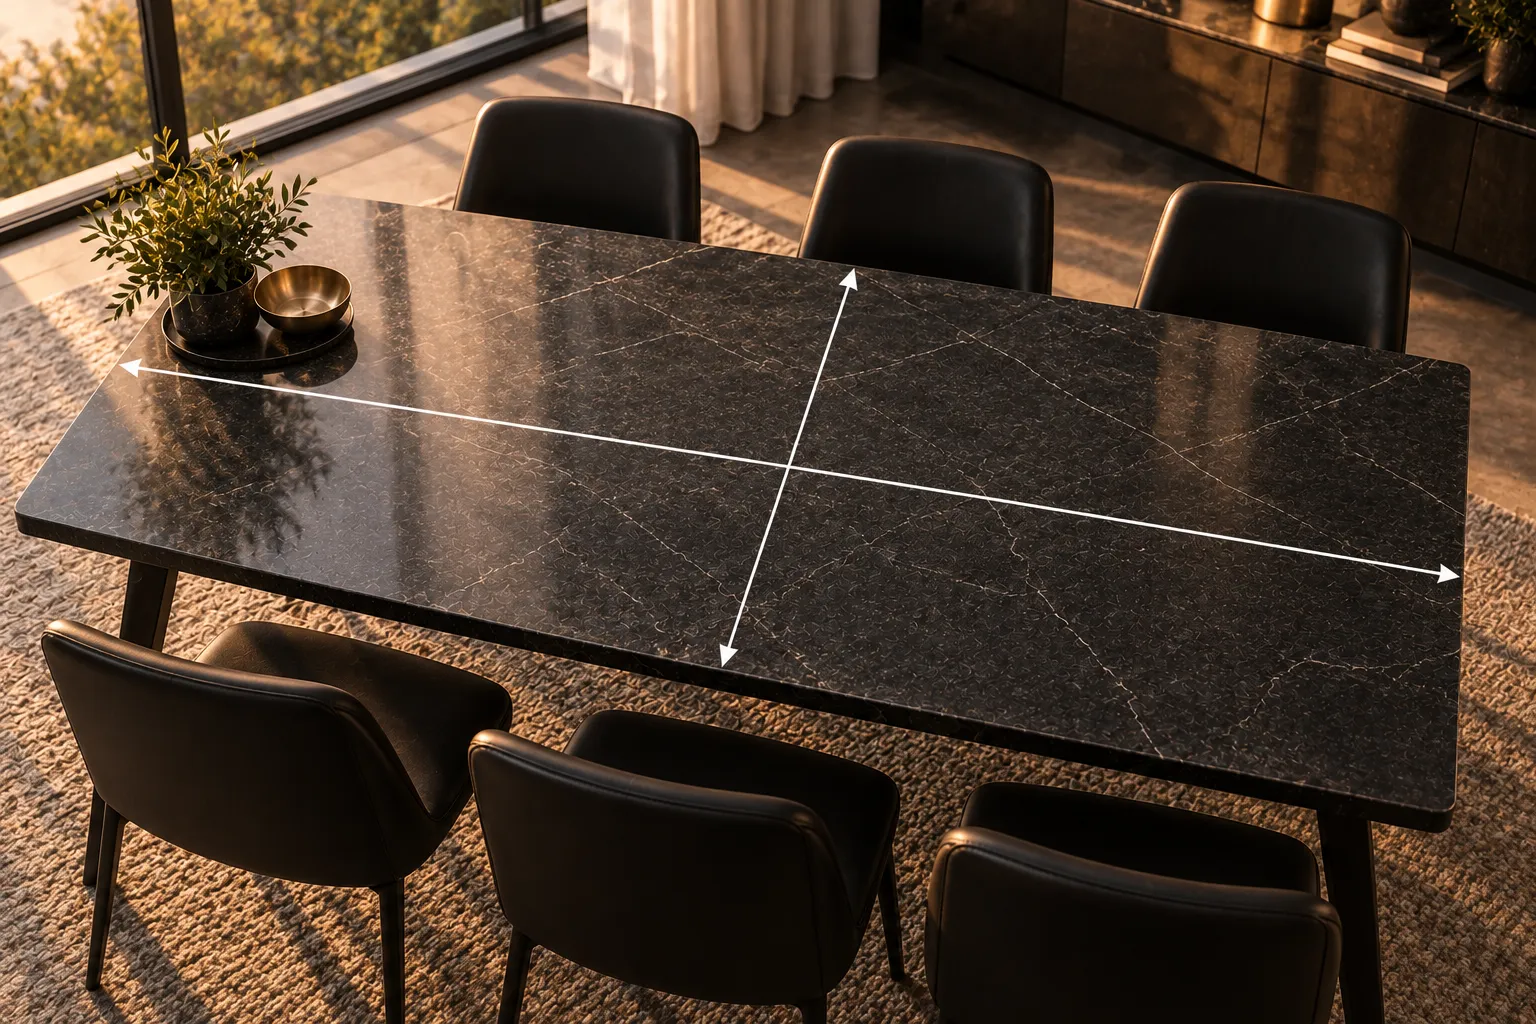
Rectangular dining table with a dark stone top seen from above, two white arrows show length and width from edge to edge.

Rectangle

  • Width in cm
  • Length in cm

Two dimensions: width and length. Measure each edge at two points – front and back, left and right.

  • If the dimensions differ, the surface is not square: then choose “Irregular quadrilateral” or trapezoid.
  • Square: one dimension, the side length.
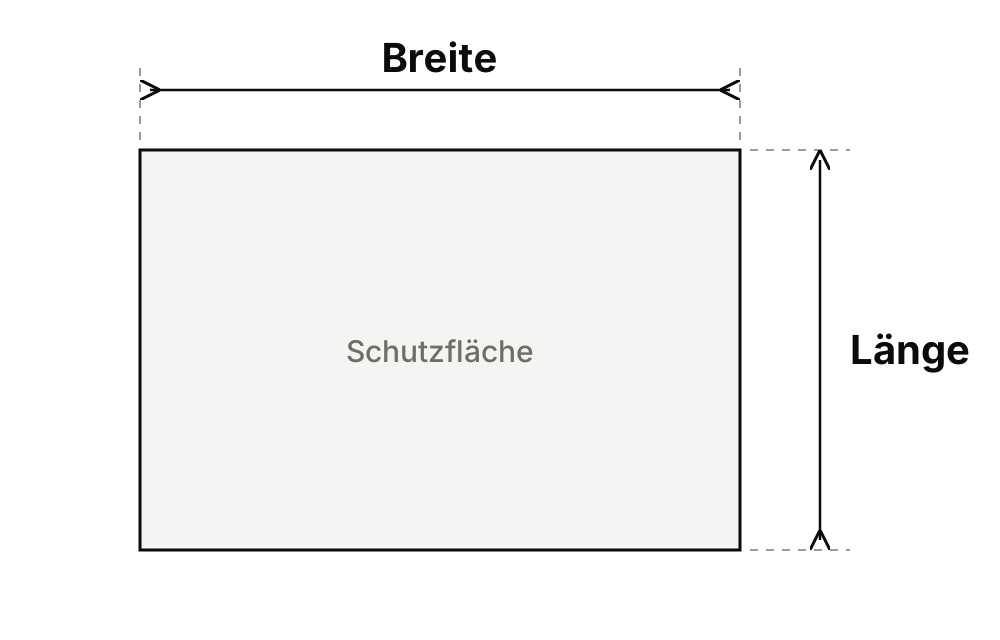
Top view of a rectangular surface: the width runs horizontally and is dimensioned at the top, the length runs vertically and is dimensioned on the right.
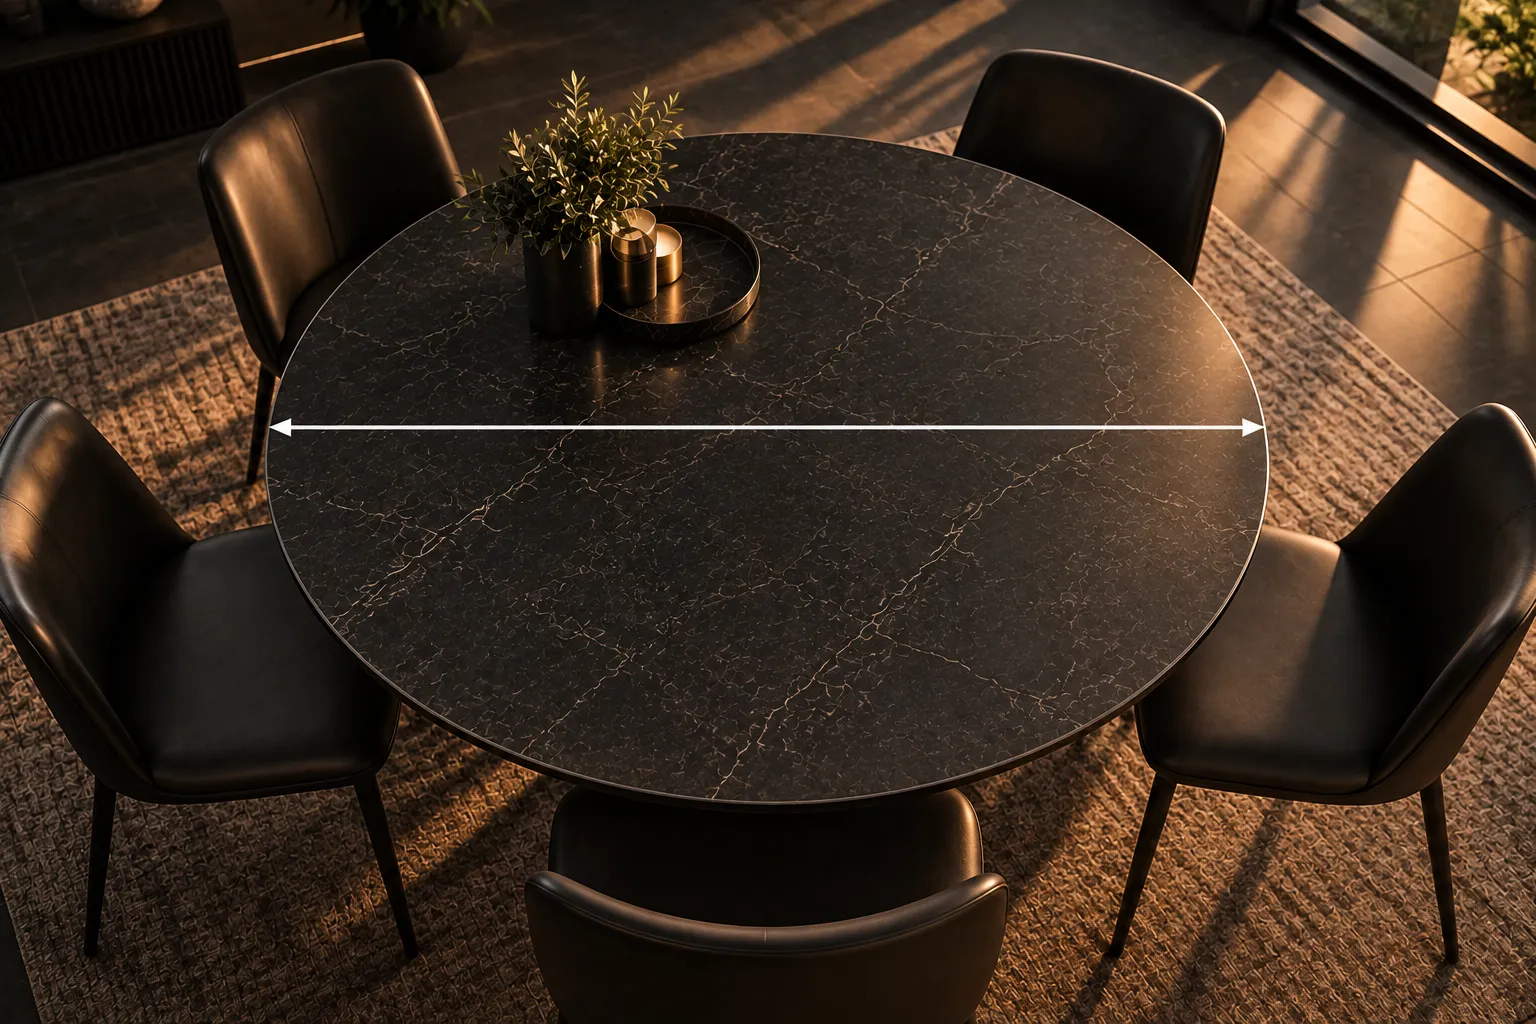
Round dining table with a dark stone top seen from above, a white arrow shows the diameter from rim to rim.

Circle

  • Diameter in cm

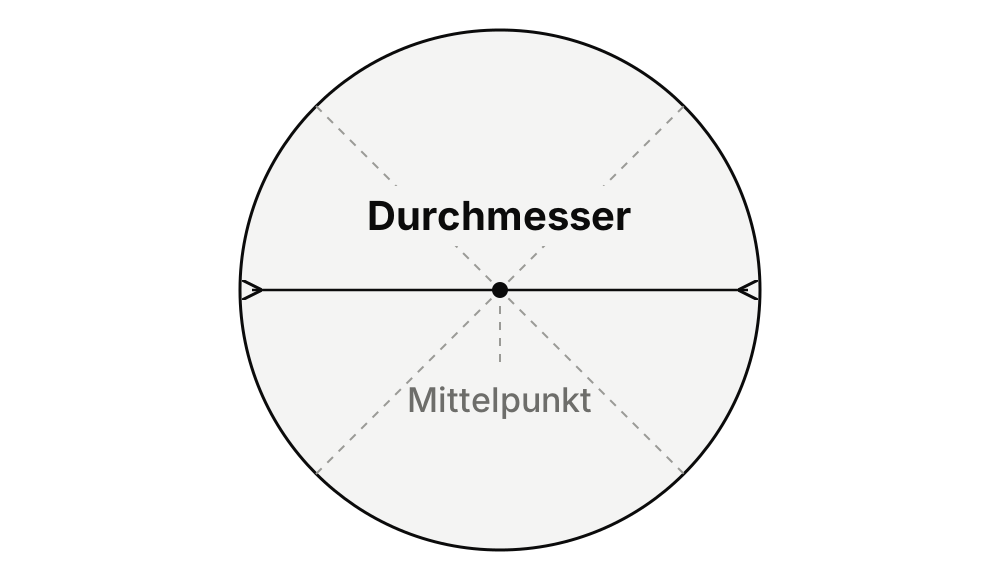
One dimension: the diameter – from edge to edge, the line passes through the centre. No radius, no circumference.

  • If the dimensions differ by direction, the surface is not a circle – then “Oval” or a template fits.
A dimension arrow runs through the centre of a circular surface from edge to edge.
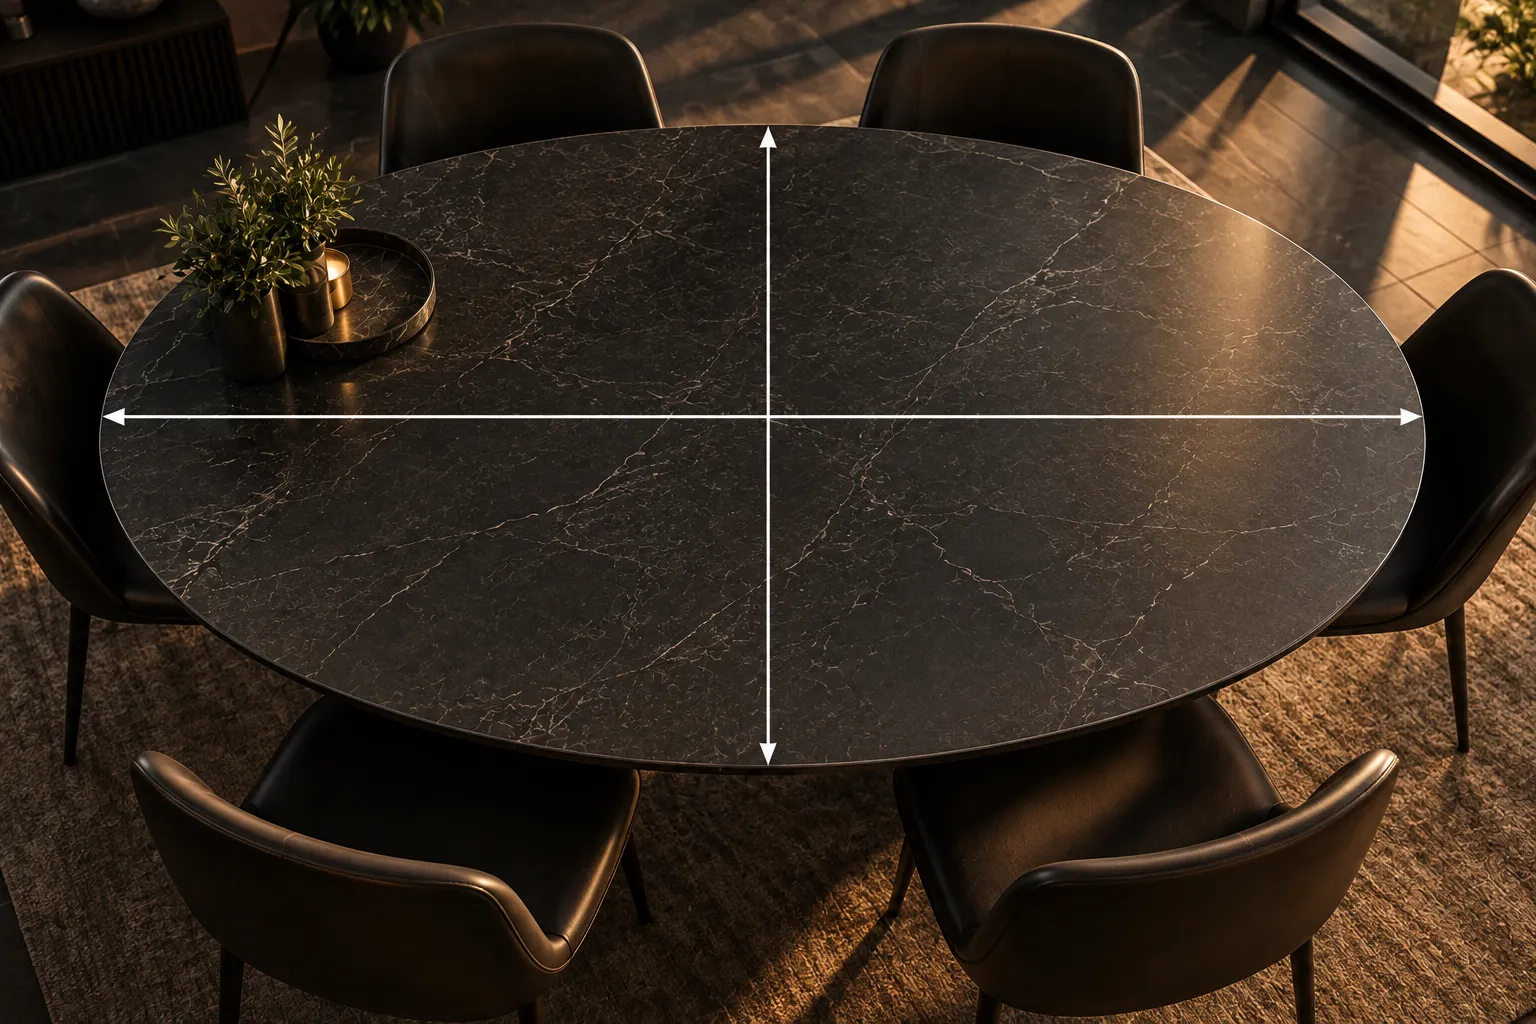
Oval dining table with a dark stone top seen from above, two white arrows show the greatest length and width through the centre.

Oval

  • Width in cm
  • Length in cm

Two dimensions: the greatest width and the greatest length – each measured through the centre. The cut needs nothing more; the contour follows from both values.

  • An oval with straight side sections (stadium shape) is not an oval in the configurator – use “Rounded corners” with a large radius or a template for that.
Measuring an ovalWidthLengtheach through the centre, at the widest point
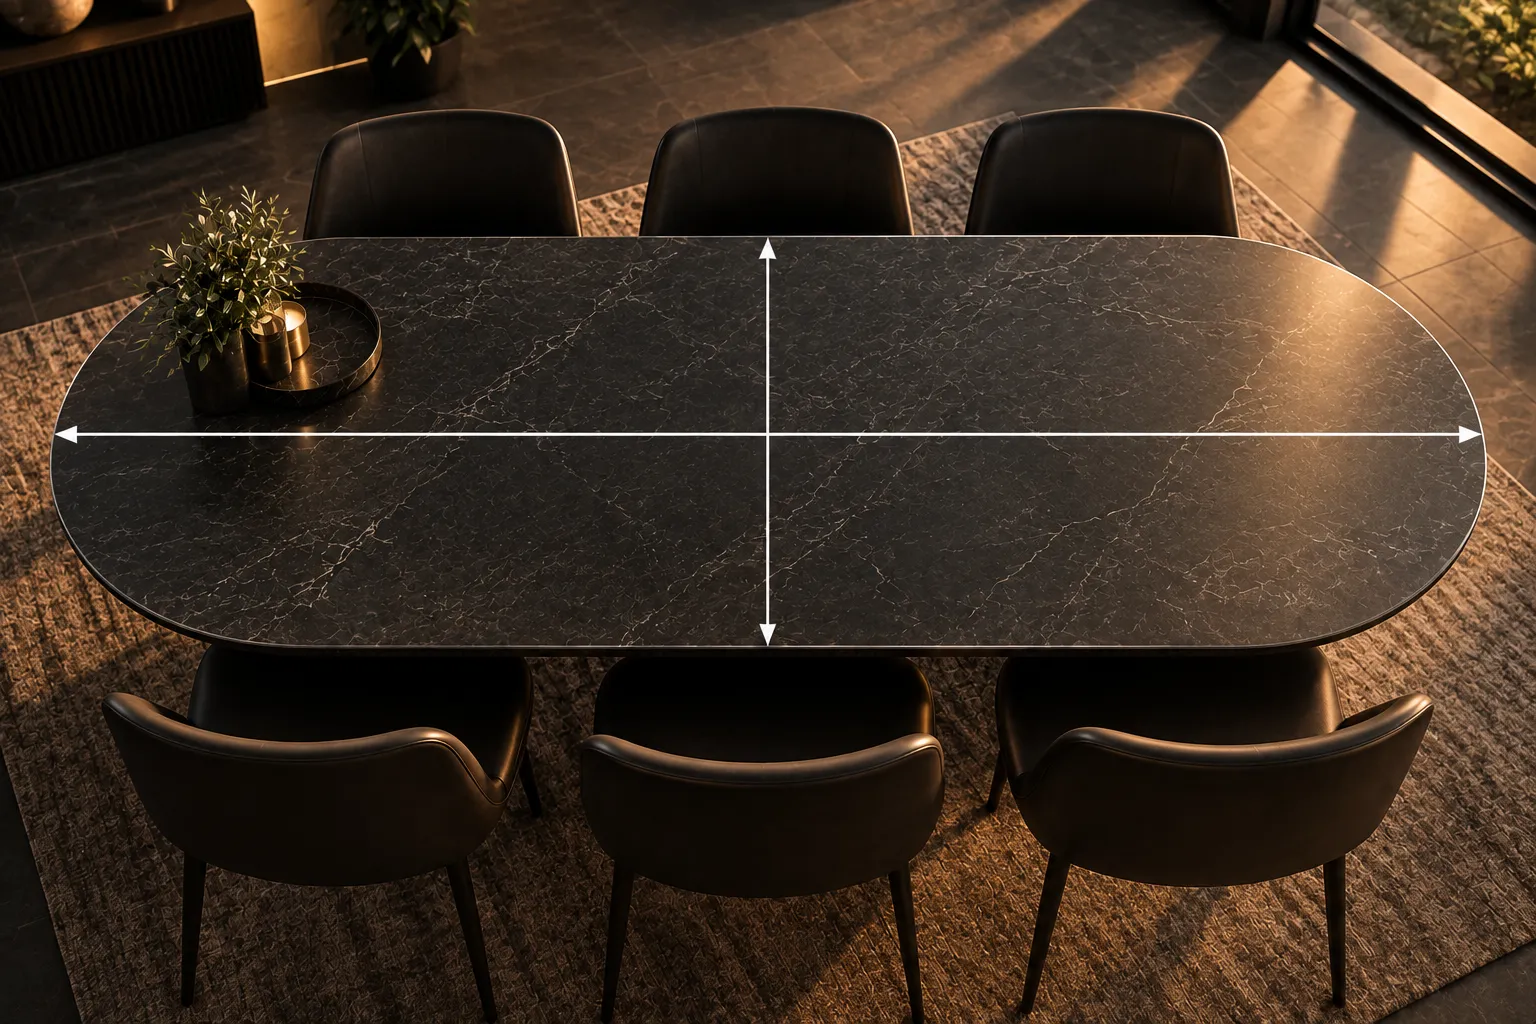
Long dining table with straight sides and rounded ends seen from above, two white arrows show length and width from edge to edge.

Rectangle with rounded corners

  • Width in cm
  • Length in cm
  • Corner radius in mm

Three dimensions: width, length and the corner radius. Measure width and length across the straight edges as for the rectangle; the radius describes the rounding of the corner.

  • The corner radius applies equally to all four corners. How to determine it is in the next section.
Measuring a rectangle with rounded cornersWidthLengthRRCorner radius R the same at all four corners
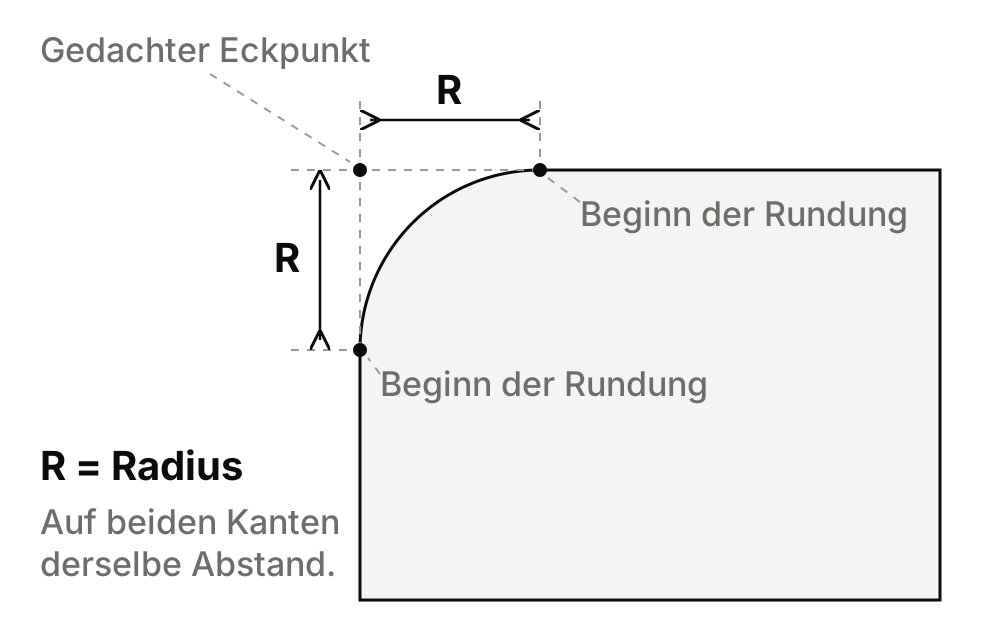
An evenly rounded corner in top view. The straight edges are extended with dashed lines to the imaginary corner point; the distance from the corner point to the start of the curve is dimensioned as R on both edges.

Measuring a rounded corner correctly

The corner radius is the radius of the quarter circle that rounds the corner – measured in plan view. A small radius is an almost sharp corner, a large one a wide curve.

  1. 1Place a ruler along each of the two straight edges and extend them in your mind until they meet: that is the imaginary corner point.
  2. 2Measure from this corner point along the edge to the point where the rounding begins.
  3. 3This distance is the radius – the same on both edges. Enter it in the “Corner radius” field in millimetres.
  • The configurator allows 0 to 200 mm; the radius may also be at most half the shorter side – the field shows the limit for your dimensions.
  • This means the contour from above, not the rounding of the edge in cross-section.
  • If the rounding is uneven or different at each corner, better lay on the test template or send the contour as a template – do not guess.
  • Enter the radius in millimetres – do not estimate it from a photo.

More shapes in the configurator

The remaining shapes with the dimensions they need – named as in the configurator. For triangle, trapezoid and quadrilateral, the preview there shows which dimension belongs to which edge.

  • SquareSide length (cm)
  • Triangle (right angle)Side a (horizontal) (cm) · Side b (vertical) (cm) · Corner radius (mm)
  • Triangle (three sides)Side a (cm) · Side b (cm) · Side c (cm) · Corner radius (mm)
  • TrapezoidBottom side (cm) · Top side (cm) · Height (cm) · Shift of the top side (cm) · Corner radius (mm)
  • Skewed quadrilateralBottom side (cm) · Left side (cm) · Right side (cm) · Angle bottom left (°) · Angle bottom right (°) · Corner radius (mm)
  • Free formWidth (cm) · Length (cm)

Limits and special cases

Dimensions that decide the cutting option and the number of strips – so settle them before ordering.

  • The shorter edge may measure at most 180 cm – that is the roll width; wider surfaces are laid in several strips (see “Large surfaces” directly below). The longer edge is free up to 1000 cm.
  • The shortest edge measures at least 10 cm.
Large surfaces+
  • If the shorter side is wider than the roll, you divide the surface into strips. For rectangle and square the configurator works them out: equally wide strips with 2 cm overlap that you order together. The seam is hardly visible with transparent film.
  • Place the seam at an edge, joint or transition where it does not stand out anyway.
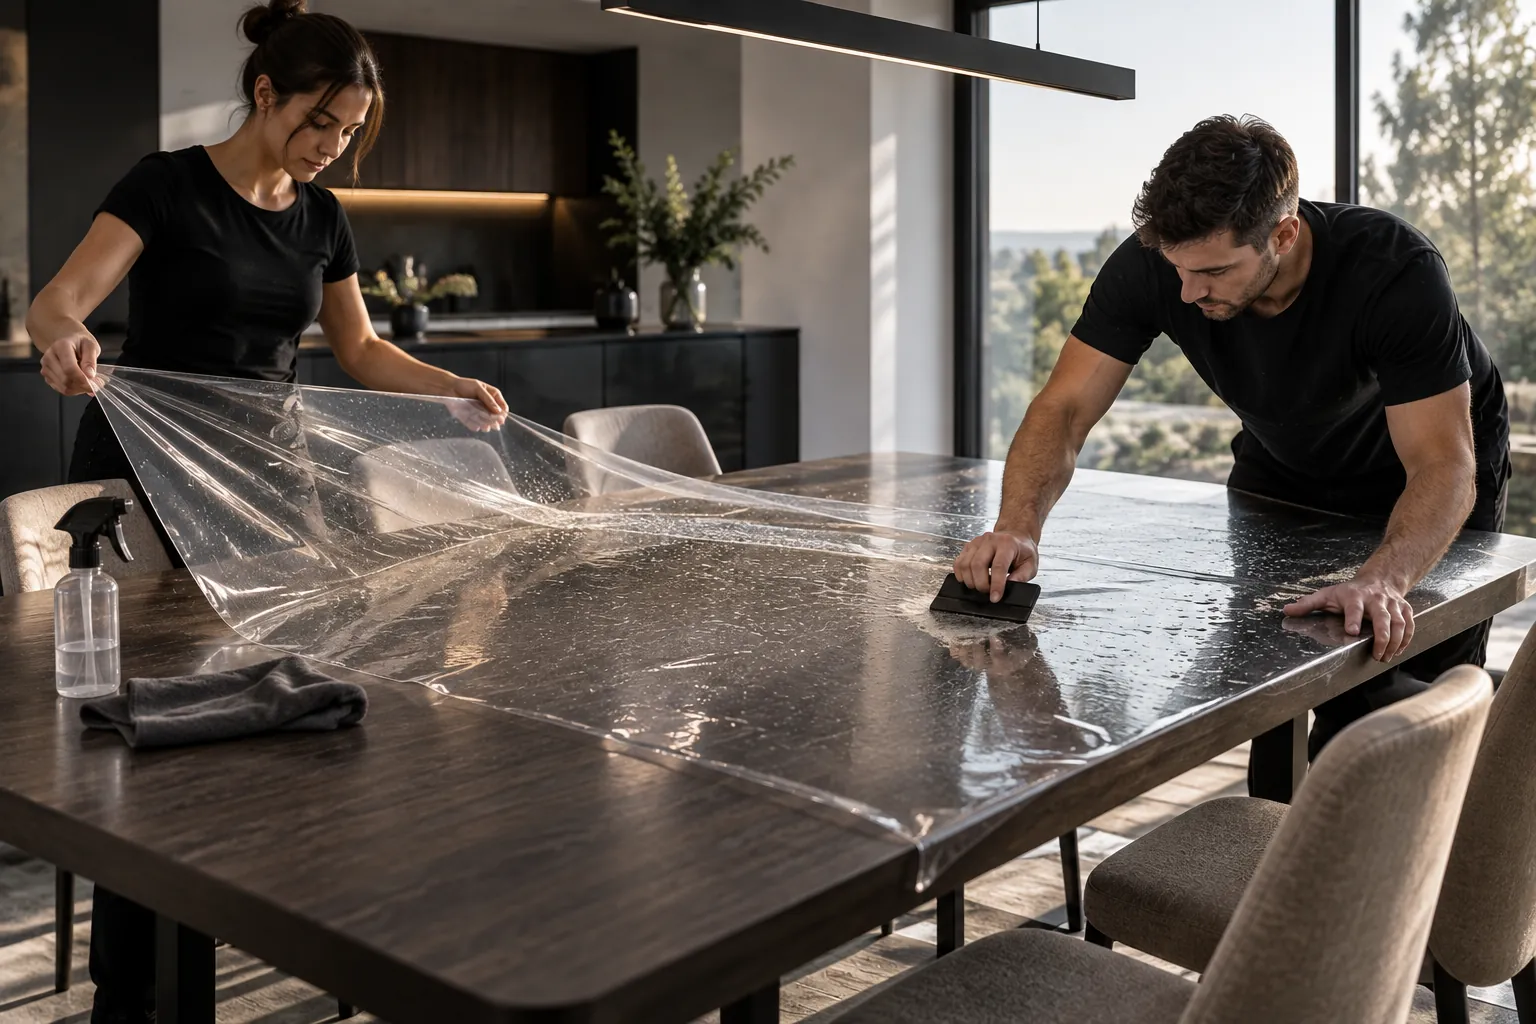
Two people applying a transparent film to a dining table: one lifts the wet film, the other squeegees it out.
Rounded table edge in cross-section+
Plan view and edgePlan-view dimensionPanel in cross-sectionrounded edge – not a corner radiusFilm ends at the edge

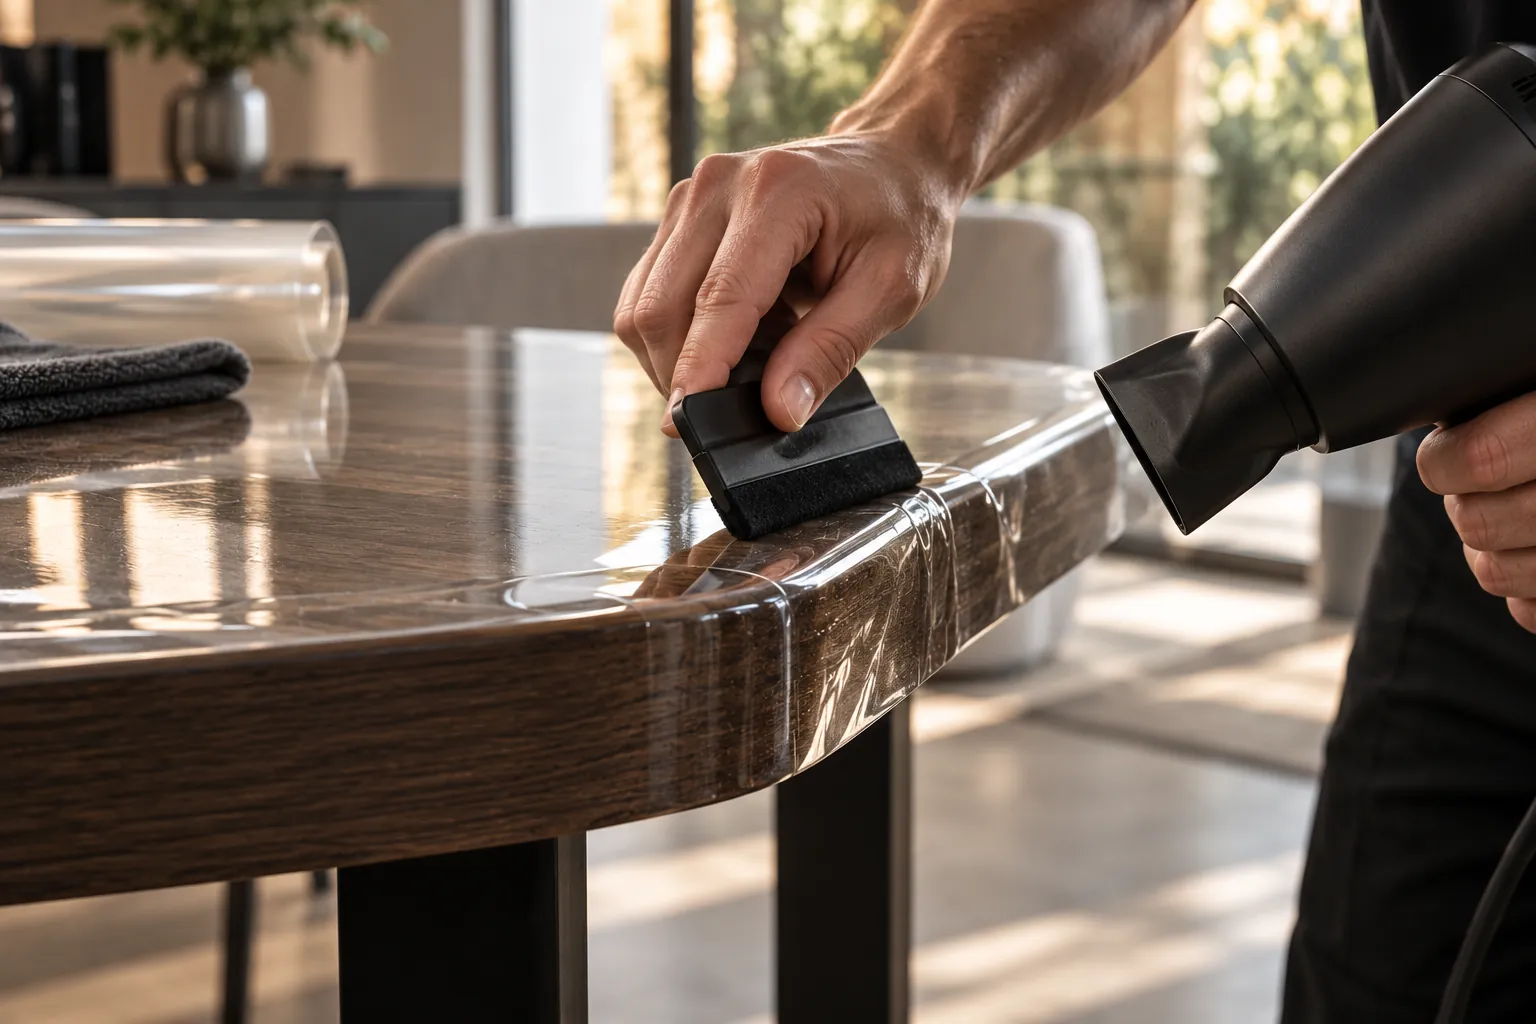
The cut is meant for the surface from above, not for wrapping over every edge. If the film is to go round a rounded edge, it needs material beyond the plan-view dimension for that – so “Cut it yourself” with allowance, heat at the edge and the cut last.

The corner radius describes the rounding in plan view (see Measuring a rounded corner), not the rounding of the edge in cross-section.

One hand presses the film onto a rounded table edge with a squeegee, the other warms the edge with a hair dryer.
Handles and cut-outs+

For “Cut it yourself” you lay the film over the whole front and cut around handles and cut-outs on site. If the cut-outs are to arrive ready cut, choose the free shape with template and “Exactly to size”.

04

Check dimensions & special shapes

Lay it on before ordering: the 1:1 test template

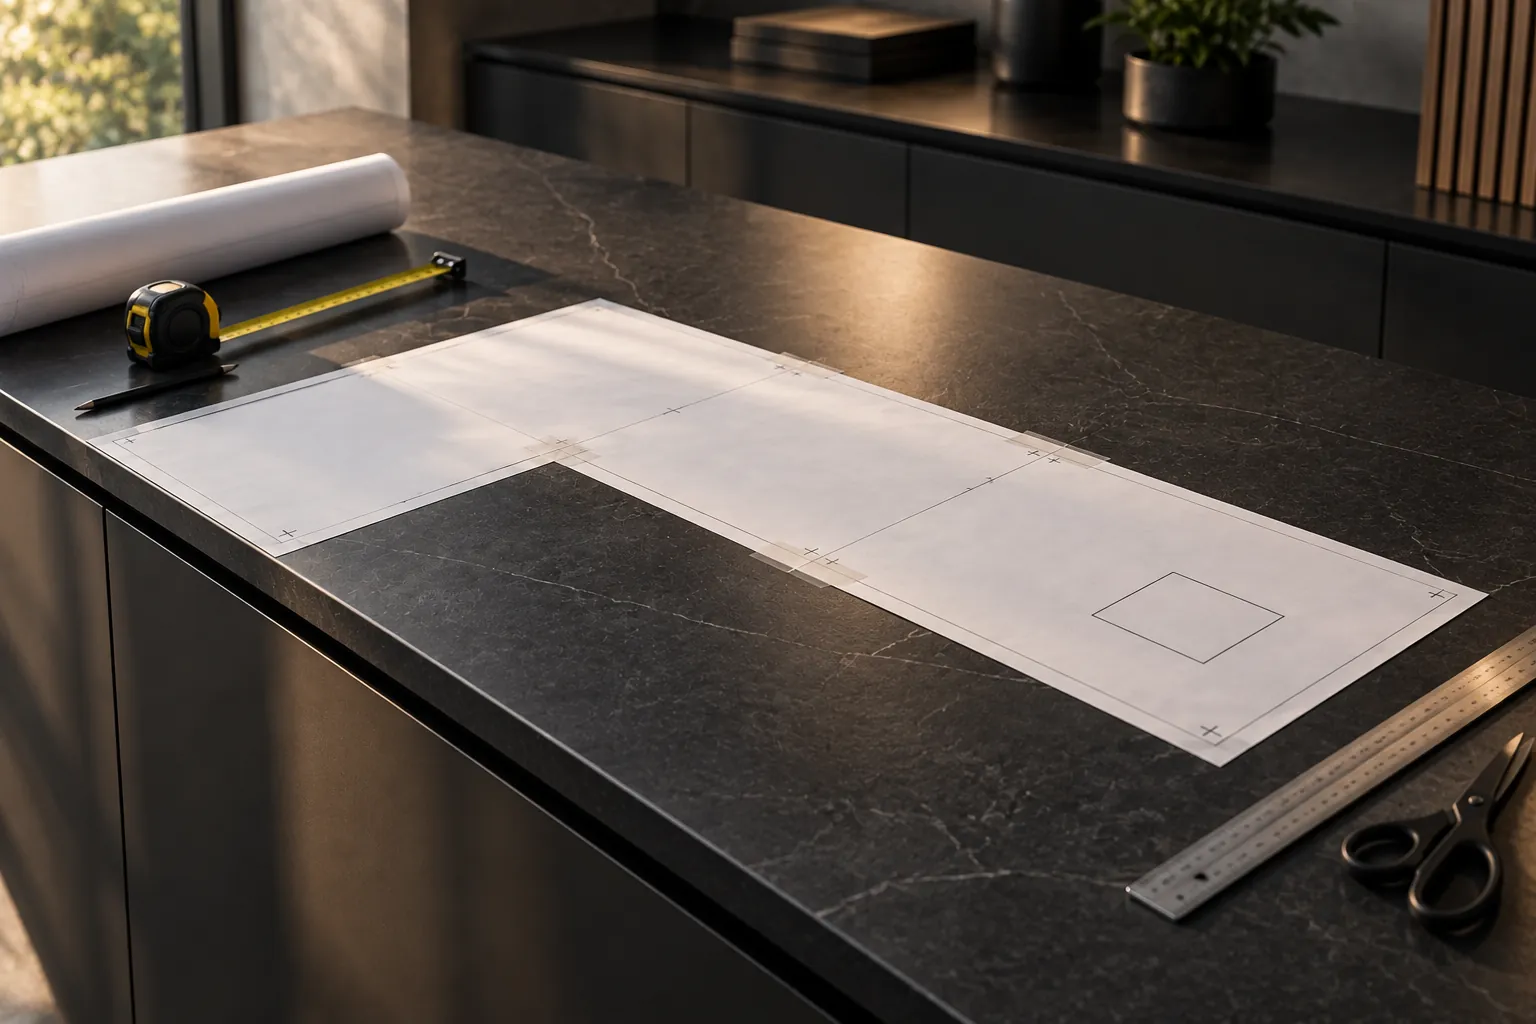
Anyone measuring a tabletop or an alcove can easily be a few centimetres off – and a wrongly measured cut is wasted. That is why the configurator creates a 1:1 test template to print for every shape. It sits below the price as soon as the dimensions are valid.

  1. 1Enter shape, dimensions and radius in the configurator and download “Test template 1:1” – the PDF is created in the browser.
  2. 2Print at “Actual size” or 100 % – not “Fit to page”.
  3. 3Check the control dimension: the check square on the cover sheet must measure exactly 10 × 10 cm. Otherwise the template is wrong – correct the print setting and print again.
  4. 4Lay out the pages according to the plan, A1 top left. Slide the grey glue strip under the page to the left or above until the registration marks line up, and tape it down.
  5. 5Cut along the black line and lay it on the surface. If everything fits – including the corners – order with the same dimensions.
  • The drawings above explain measuring; they are not templates. Only the test template is to scale.
  • For a free shape with an uploaded file there is no test template – there your file counts as the contour.
Go to configurator
Paper template taped together from several sheets on a dark worktop, next to a tape measure, pencil, steel ruler and scissors.
10 × 10 cm

Check square on the cover sheet

Measure it with a ruler after printing. If the square is right, the whole template is right.

Special shape or complex surface?

Not every surface is a rectangle, circle or oval. Two routes lead on – and both first need the rectangle that encloses your shape (width × length).

Flat and slightly curved surfaces can be covered this way. Strongly curved, three-dimensionally shaped parts – such as wings or mirror caps – cannot be applied without creases from a flat cut; they belong in the hands of a wrapping professional.

Free shape in the configurator

Upload the contour as a file – PDF, SVG, DXF, PNG or JPG up to 4 MB – and with “Exactly to size” we cut it just like that, including cut-outs and holes.

Configure a free shape

No file? We’ll take a look

If you have no file or are unsure whether the surface can be covered flat at all: a photo, dimensions and a short description are enough – we tell you whether and how.

Send photo and dimensions
Series and parts from drawings: enquiry for business customers →
Part 2

Once your film has arrived

Prepare, install, care – and what to do if something is not right.
05

Prepare the installation

Three points before you pick up the spray bottle. Most bubbles and inclusions arise before the installation, not during it.

What you need

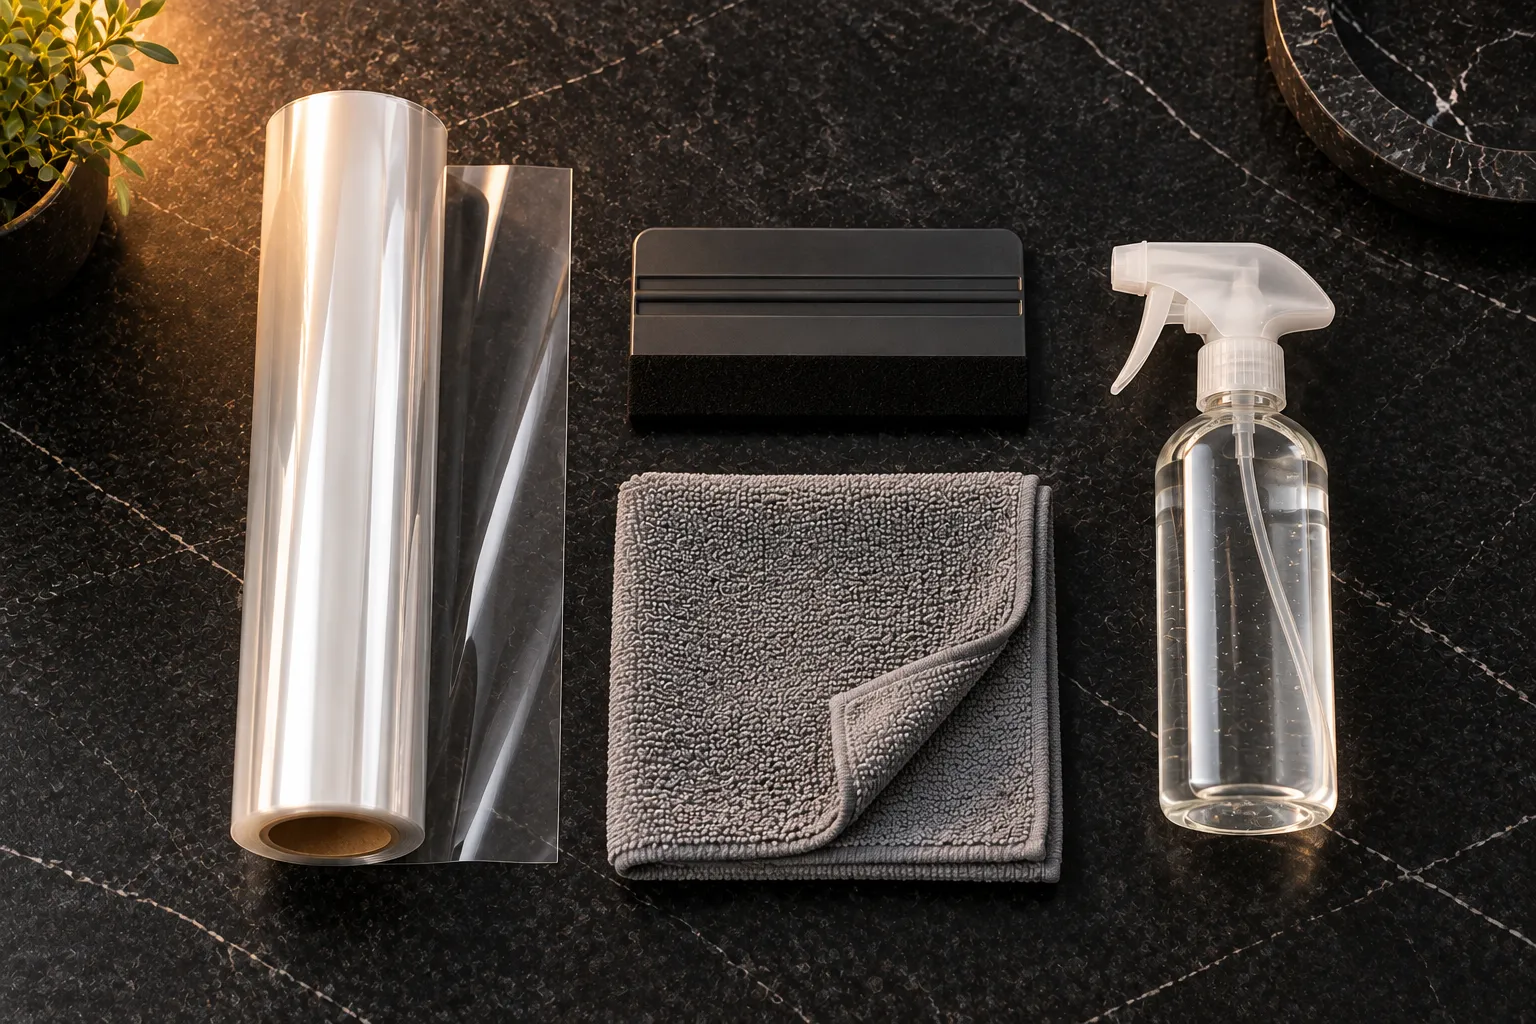
Film roll, felt-edge squeegee, folded microfibre cloth and spray bottle side by side on a dark stone top.

Required

Spray bottle with application solution
Wet surface and film – wet, the film stays repositionable. Water with a drop of washing-up liquid is enough.
Squeegee with felt edge
Work solution and air out from the centre outwards. A hard plastic edge can scratch the film – hence felt.
Lint-free cloth
Cleaning before installation, wiping off the solution at the edges.
Tape measure or ruler
For measuring before ordering and for holding up the cut.

Only for “Cut it yourself”

Sharp cutter with spare blades
Only for “Cut it yourself”: cut overhang, radii and cut-outs on site. Not needed for “Exactly to size”. Carefully – the blade can damage the surface underneath.

Helpful

Hairdryer
A little heat at edges and radii so the film settles – the thicker High Gloss needs more of it than the Clear.
Second person
For large cuts, to hold and align – a table or a kitchen front is hard to lay on cleanly alone.

If you already own a squeegee with felt edge, a lint-free cloth and a spray bottle, you do not need the set as well – then order the film on its own. View the Application Kit

Before you start

  1. 01

    Work in a low-dust environment

    Dust and fibres that get under the film stay visible – with every film, especially on glass and high gloss. Vacuum or wipe beforehand, do not shake out textiles, keep windows closed.

  2. 02

    Check the film

    The film arrives rolled, never folded – a crease would stay visible. If the package is damaged or the film creased, contact us with a photo before applying. Hold the dimensions against the surface once.

  3. 03

    Hands and workspace

    Clean, dry hands and a free surface to lay down the film. For large cuts, bring in the second person now, not only when laying on.

Notes per film

Clear
The thinnest film – follows tight radii most easily.
Premium Clear
Thicker than the Clear, otherwise the same installation. Self-healing: fine scratches even out.
Matte
Dust and fibres under the film stay visible – clean thoroughly. Do not polish after installation.
High Gloss
The thickest film: needs more heat and patience at edges and radii. Inclusions are easy to see on high gloss – prepare dust-free.
06

Installing the film – in five steps

The film is wet-applied. That sounds like more effort, but it is the reason it works even the first time: as long as the application solution has not evaporated, the film can be moved and corrected.

Your cutting option:
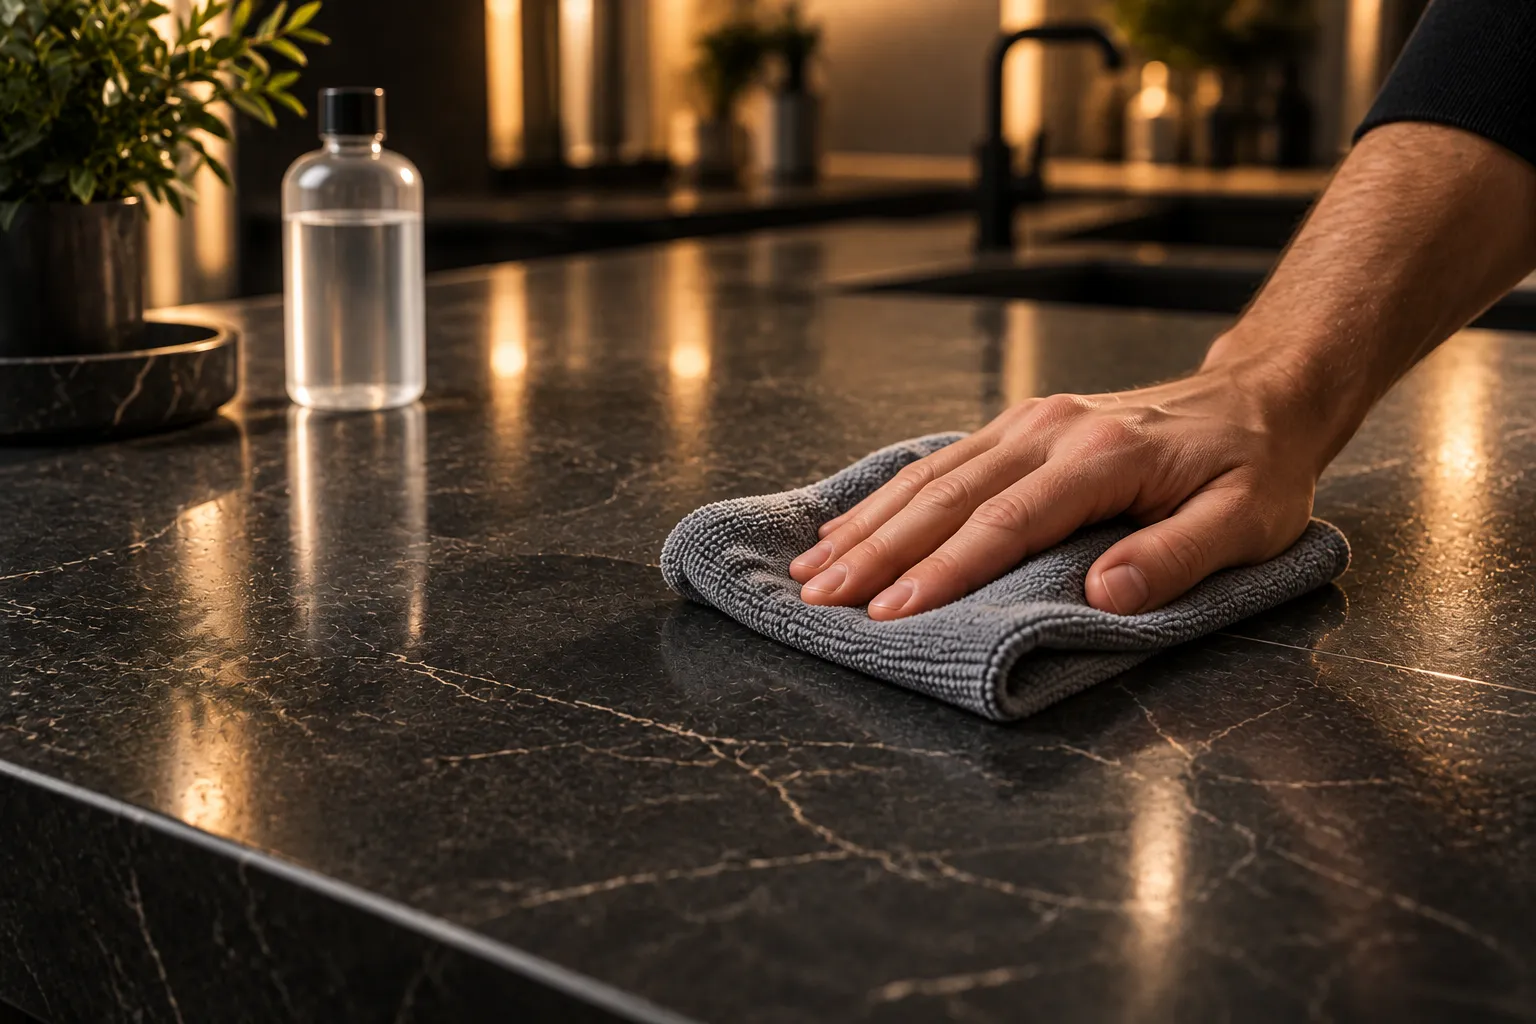
  1. A hand wiping a dark stone-look worktop with a folded microfibre cloth, a clear bottle behind it.
    1

    Step 1 – Clean

    Clean the surface thoroughly and let it dry completely.

    • Remove loose dust, then grease and residues – oil and wax residues prevent adhesion.
    • Wipe dry with the lint-free cloth and let it dry completely.
    • Do not forget edges and corners – that is where the film lifts first if grease remains.
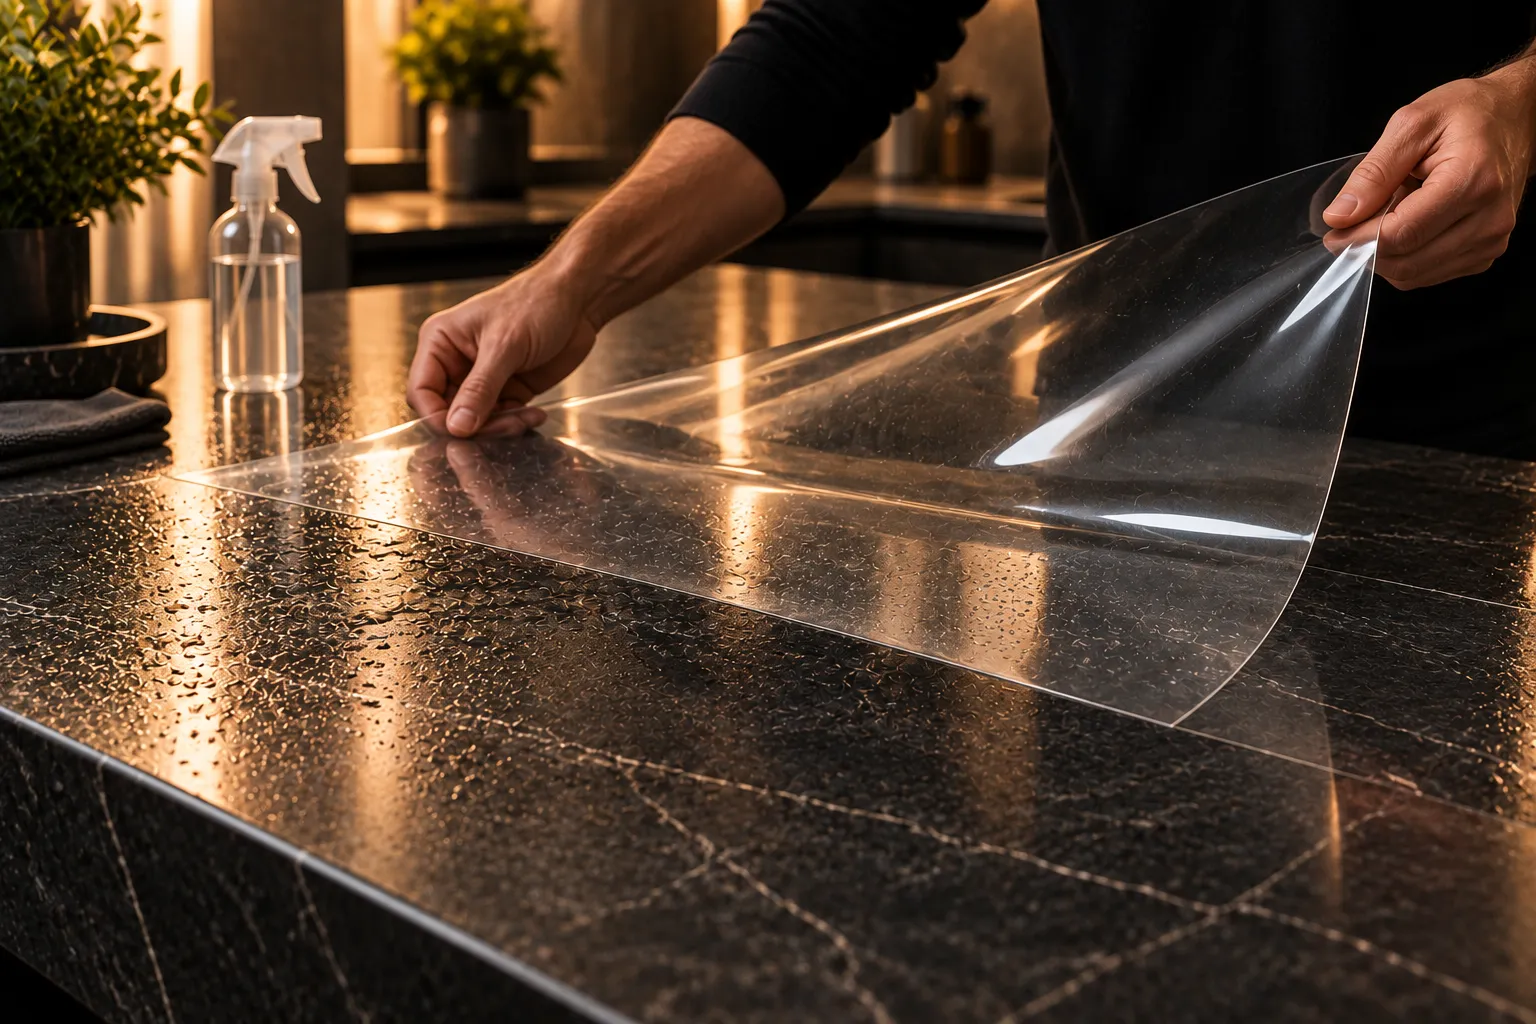
  2. Two hands laying a large transparent film onto a wetted dark stone top, one half already down.
    2

    Step 2 – Hold in place

    Hold the cut in place dry and check the position.

    • Hold the cut dry against the surface and check the position: does the shape fit, are radii and cut-outs right?
    • For “Cut it yourself”: leave an overhang all round – it is trimmed at the edge after applying.
    • For “Exactly to size” the film is already the final shape – do not recut anything.
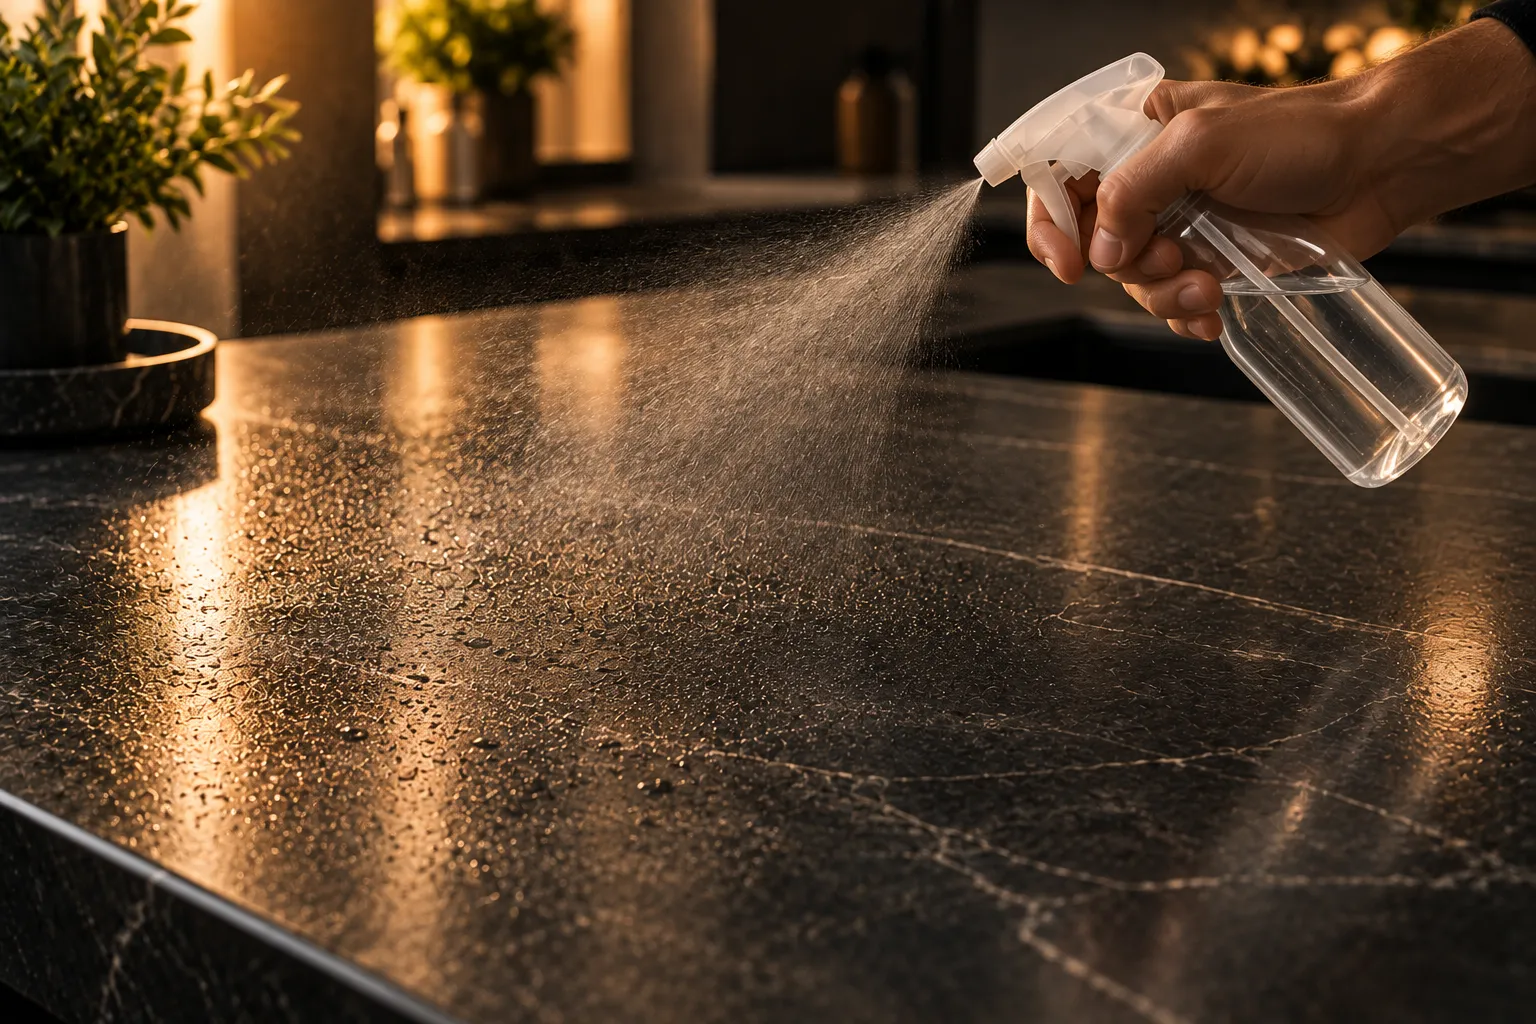
  3. A spray bottle wetting a dark stone-look worktop with a fine mist.
    3

    Step 3 – Wet

    Wet film and surface with the application solution.

    • Spray the surface generously with the application solution – the whole surface, right into the corners.
    • Wet the adhesive side of the film in the same way. Wet, it does not bond immediately and stays repositionable.
    • Applying too dry is the most common mistake: then the film bonds at first contact and bubbles remain.
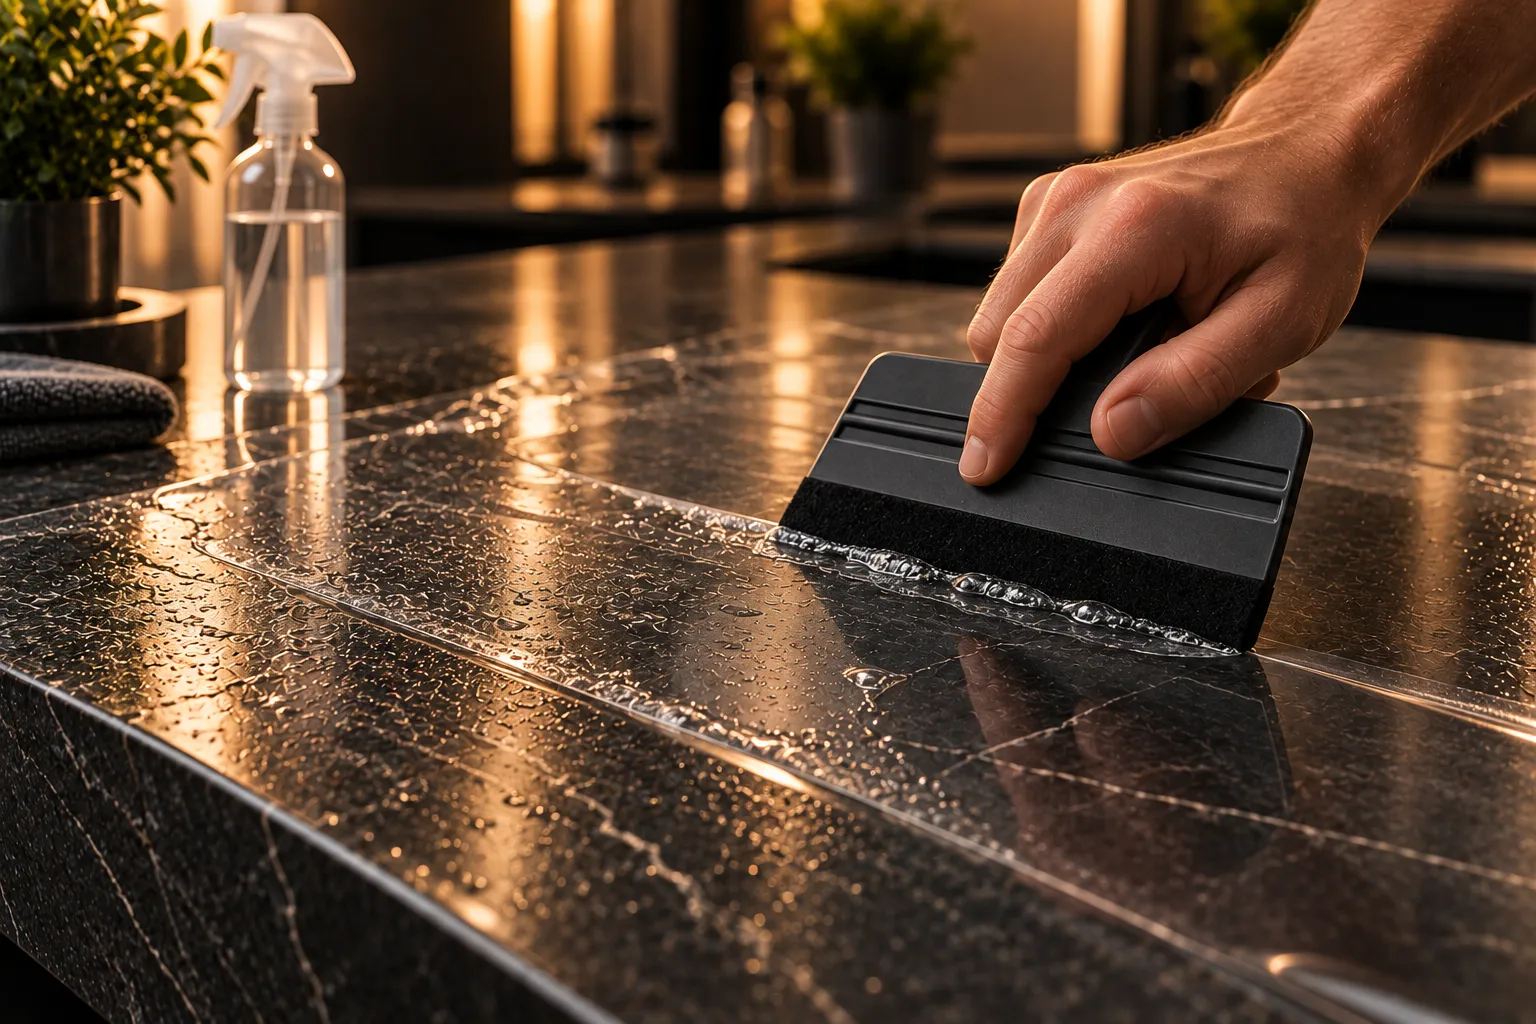
  4. A felt-edge squeegee smoothing out a wet-applied transparent film on a dark stone-look worktop, water pushed out ahead of the edge.
    4

    Step 4 – Apply

    Lay the film on and squeegee from the centre outwards.

    • Lay the film on wet and align it – as long as the solution has not evaporated, you can move and correct it.
    • Work with the squeegee from the centre outwards, in overlapping strokes to the edges. Never from the outside in – then solution stays trapped in the middle.
    • If a bubble remains: lift the film at that spot, wet it again and squeegee once more from the centre outwards.
    • Wipe up escaping solution with the cloth.
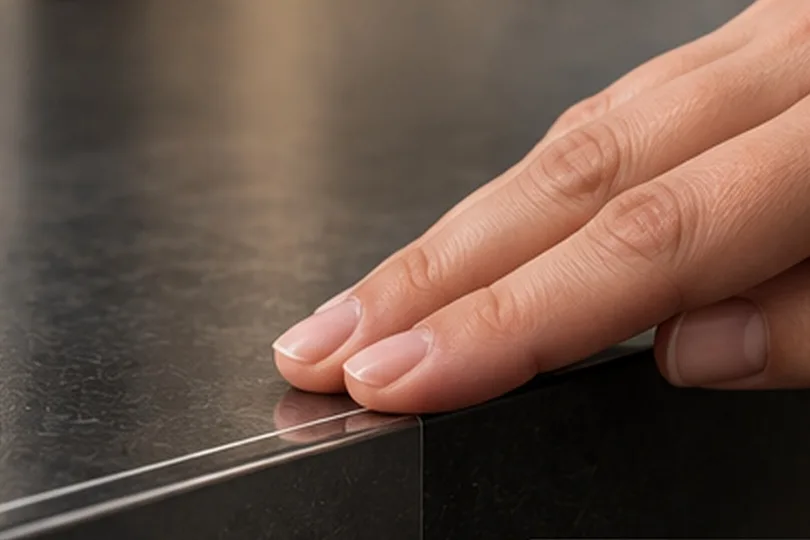
  5. Two fingertips pressing down the edge of a transparent film at the corner of a dark stone top.

    Step 5 – Done

    Press down the edges and let it cure for 24 hours.

    • Press edges and corners down firmly last; where the film does not settle, a little heat from the hairdryer helps.
    • For “Cut it yourself”, now trim the overhang along the edge – including the rounded corners; the edge underneath gives the line.
    • For “Exactly to size” the film ends where your dimension ends – measured to the edge, it sits flush. Radii and cut-outs are already cut.
    • Let it cure for 24 hours: during that time do not wet-clean, put nothing on it, do not load it.
Squeegee directionFrom the centre outwardsin overlapping strokes to the edge – never from the outside in

Three mistakes you make once

Applying dry
Without solution the film bonds immediately, and bubbles remain.
Squeegeeing from the outside in
Then solution stays trapped in the middle – always from the centre to the edges.
Loading too early
The adhesive needs 24 hours to bond fully.
Bubble, crease or lifting edge? Go to common problems →

Laying large surfaces

A dining table, a worktop, a kitchen front in one piece: that works, but not alone.

  • Work in pairs: one person holds the wetted film up, the other lays it down from one edge and squeegees.
  • Squeegee section by section: from the centre of the strip outwards, then the next strip.
Plan strips and seam →
07

Care & removal

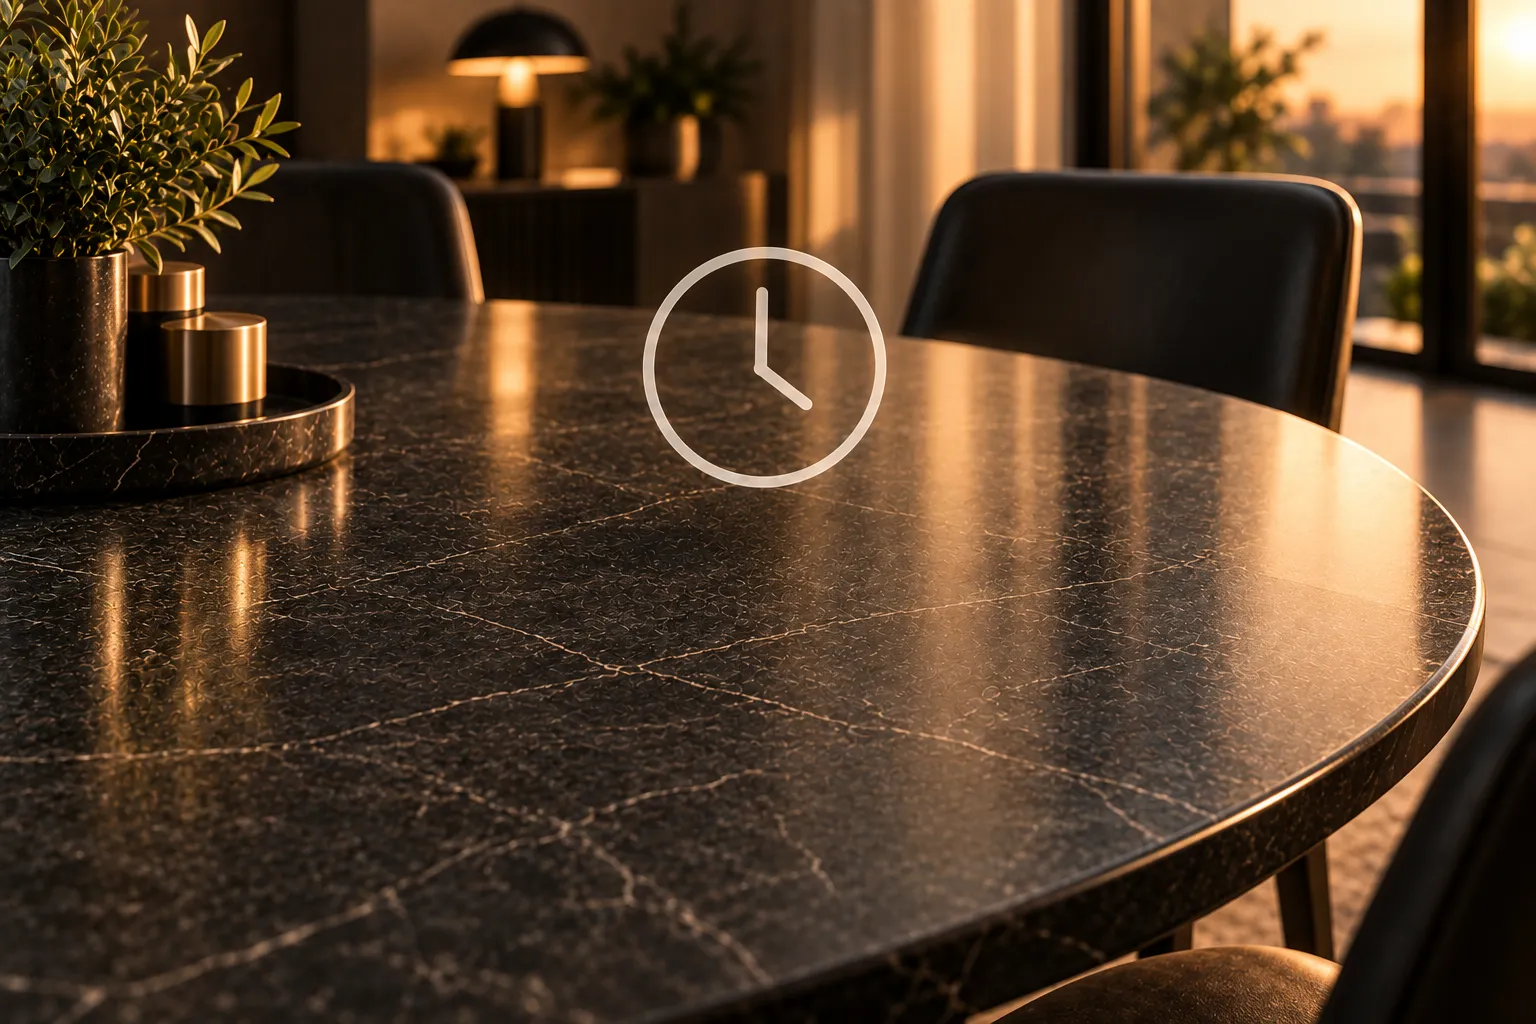
Round table with a dark stone top in evening light, a simple clock symbol above it.

The first 24 hours

After applying, the adhesive needs 24 hours to bond fully. During that time do not wet-clean the surface, put nothing on it and do not load it. After that you can use and clean the surface normally again.

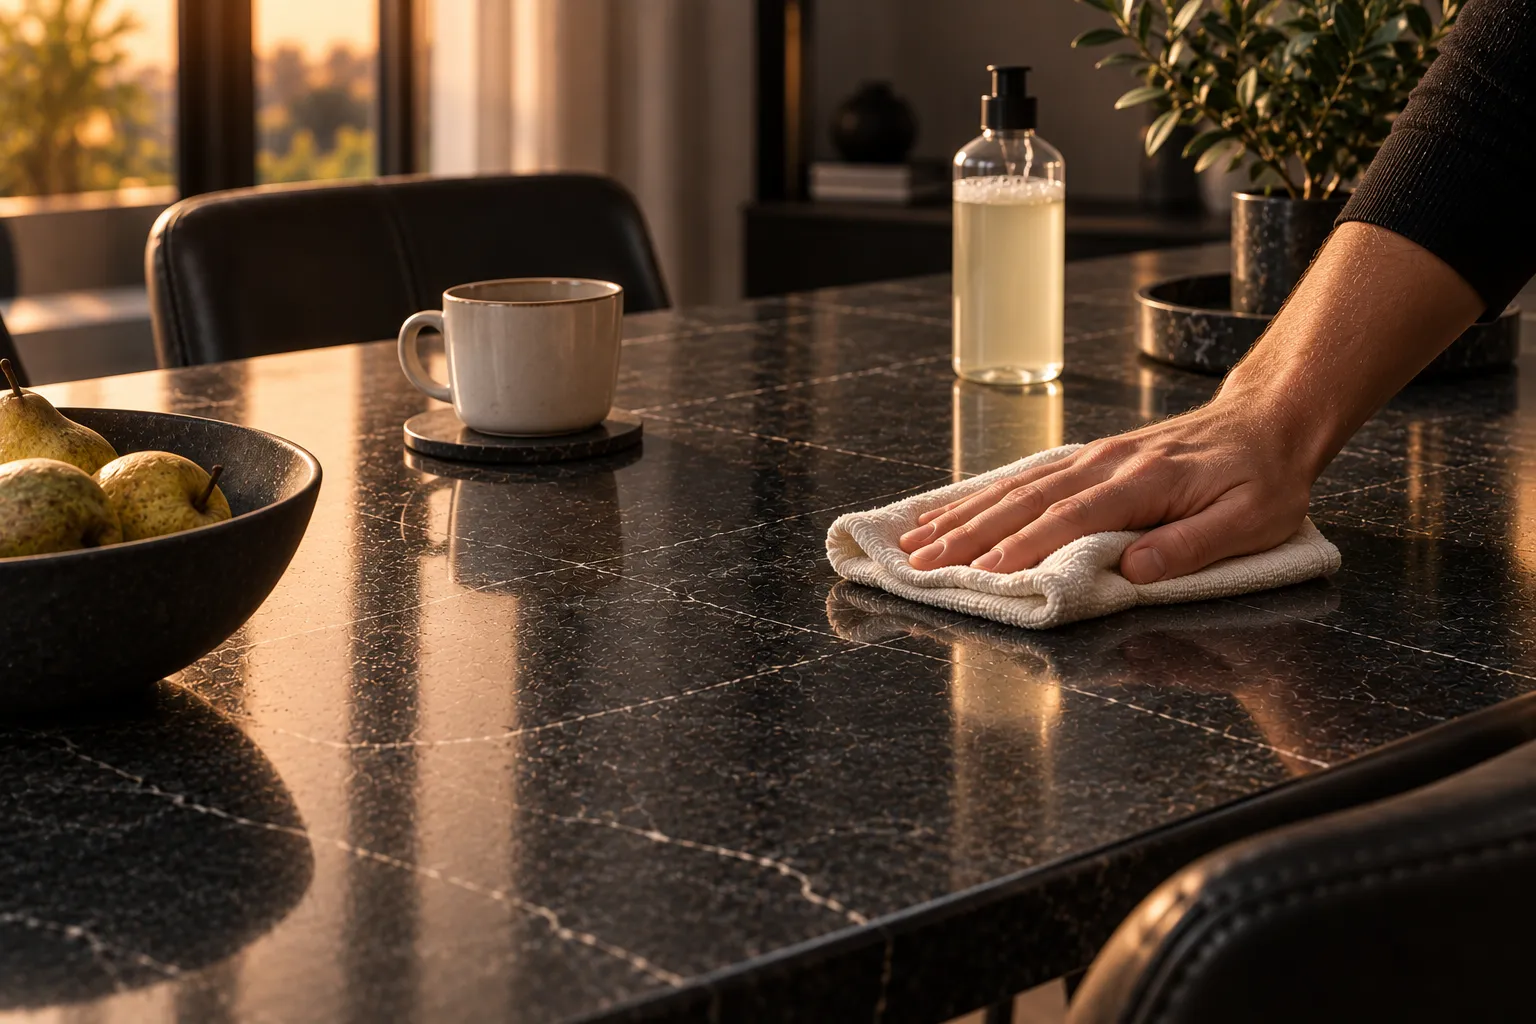
A hand wiping a dark table top with a soft light cloth, a cup and a bottle of mild washing-up liquid beside it.

Cleaning & care

  • Care for it like the surface itself: soft cloth, water, mild cleaner.
  • No abrasives, no scouring pads, no blades.
  • There is no approval for solvents or harsh cleaners – stick to water and mild cleaner.
  • Matte: do not polish – polish would rub the matte surface glossy.
Heat
The protective film is no substitute for heat protection. Hot pots, pans and baking trays still belong on a trivet. We will only state a temperature we can stand behind once we have the data sheet.
Cutting
Do not cut directly on the film – no blades on the film, use a chopping board. Premium Clear and High Gloss even out fine everyday scratches, deep cuts they do not.

Self-healing – what it means

Fine, superficial scratches – from dishes, keys or pens, say – can even out again in the surface of Premium Clear and High Gloss. Deep cuts, notches or damage to the film itself are not repaired by this. Clear and Matte do not have this property – there, fine scratches remain visible.

View Premium Clear →

Removing the film

Yes, the film can be removed again.

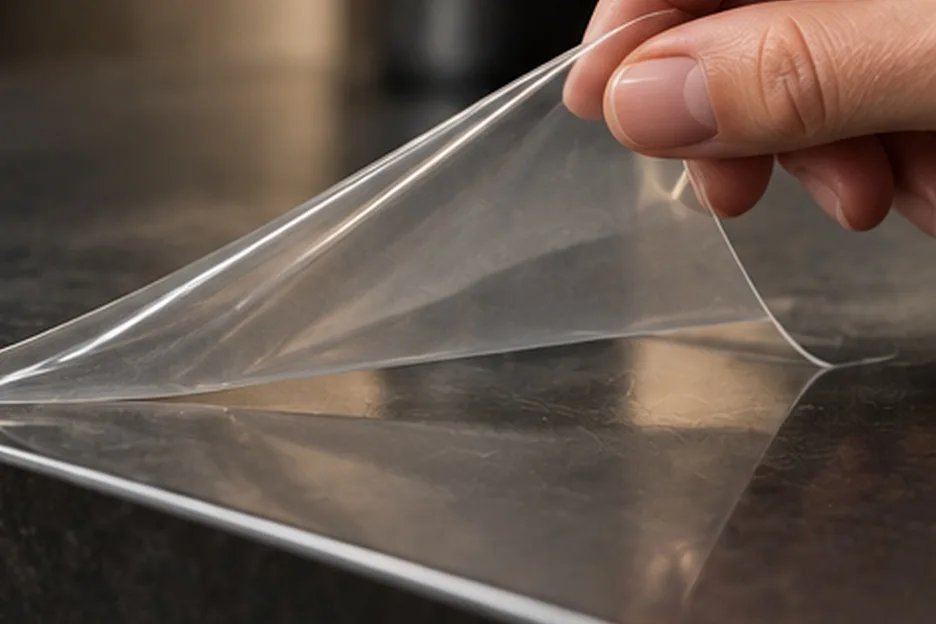
A hand peeling a transparent film off a dark stone top at a flat angle.
  1. 1Lift a corner and peel the film off slowly, at a flat angle – do not tear, do not pull steeply upwards.
  2. 2For older applications a little heat from the hairdryer helps: warm the adhesive, then keep peeling flat.
  3. 3From smooth, sealed surfaces the acrylic adhesive comes off without residue.
  • On freshly painted or uncured surfaces the adhesive can leave marks in the paint – so do not apply film there in the first place.
  • A peeled-off film cannot be used again: the adhesive no longer bonds cleanly, and the film distorts when removed. For the same surface, order a new piece via your configuration link.
  • If the film does not come off cleanly or you are unsure about a delicate surface: stop pulling, send a photo.
08

Common problems

Problem as a question, answer short. Where the answer is not enough, a photo helps – not a needle.

What to do if bubbles or solution remain under the film?+

Bubbles form when solution or air is trapped under the film – usually because it was applied too dry or squeegeed from the outside in. As long as the application solution has not evaporated: lift the film at that spot, wet it again and squeegee once more from the centre outwards. If the film is already dry, the spot can no longer be opened – then send us a photo.

Send a photo →
What to do if dust or a fibre is under the film?+

An inclusion does not disappear by itself – with no film, and on glass and high gloss it is particularly visible. As long as the film is wet: lift it at that spot, remove the inclusion with the cloth, wet again, squeegee again. After curing it stays; a peeled-off film no longer bonds cleanly. That is why preparation counts: work in a low-dust environment, clean thoroughly.

What to do if the film sits crooked or shifted?+

Wet, that is no problem: as long as the solution has not evaporated, lift the film, wet it again, realign it and squeegee again from the centre outwards. For “Cut it yourself” the overhang all round helps to even out small deviations. If the film is dry, do not peel it off and reapply – it will no longer bond cleanly.

What to do if the film creases or kinks when laying on?+

As long as the film is wet: lift the spot until the crease is free, wet it again and lay it down flat – do not squeegee over the crease. A kink from shipping stays visible; if the film arrived kinked, contact us with a photo before applying.

Send a photo →
What to do if an edge or corner lifts?+

Edges need a little heat so the film settles and holds: warm with the hairdryer and press down firmly – with the thicker High Gloss with more patience. If the edge lifts again anyway, the surface there was usually not grease-free or the surface is unsuitable for the adhesive – send us a photo.

Send a photo →
What to do if the film does not hold or comes off over a large area?+

Usually the surface: oiled, waxed, open-pored, freshly painted or not cleaned grease-free. Check the surface in the material list above. If the surface is suitable and clean, send us a photo of the surface and the detached spot.

Send a photo →
What to do if the surface looks milky or blotchy after installation?+

Right after applying, that can be application solution still lying under the film. If the impression persists after the first 24 hours, send us a photo in daylight – we will only state a drying time beyond the 24 hours once we can substantiate it.

Send a photo →

Problem after installation? Send a photo.

A photo of the spot and of the whole surface tells us more than any description. Plus film, surface and cutting option – then we can say what to do.

Send a photo

Not ordered yet?

Configure film to size

The QR code on the insert leads to your cut – and from there to this page, to read up next to the surface.