
Protective film for tables & furniture
A self-adhesive cut that sticks crystal clear to the top – for dining table, desk, sideboard and every smooth, sealed furniture surface.
- Cut to your dimensions, only cut after you order
- Rectangle, rounded corners, circle and oval
- Premium Clear for dining table and desk, Clear for sideboard and chest of drawers
Delivery in 2–4 working days · plus shipping €5.99, free from €55.00
Example: Side table Ø 50 cm · from €19.63 · Premium Clear, cut it yourself
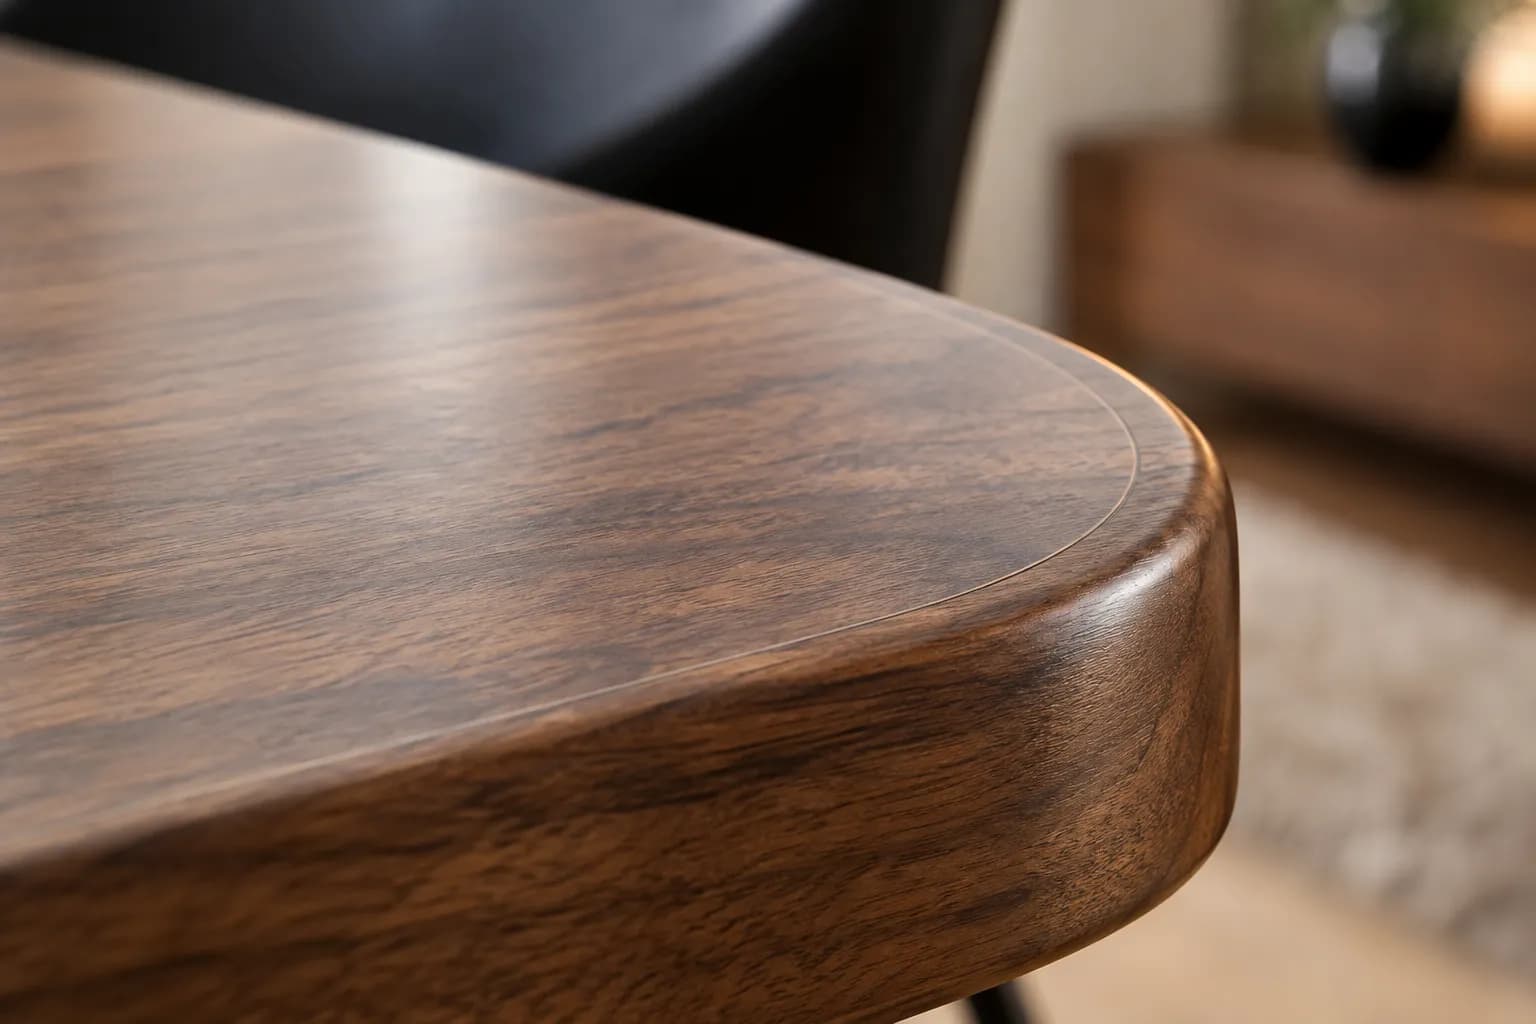
A year at the dining table in 30 seconds
Winter, spring, summer, autumn, Christmas – a year’s traces stay on the film, not on the wood.
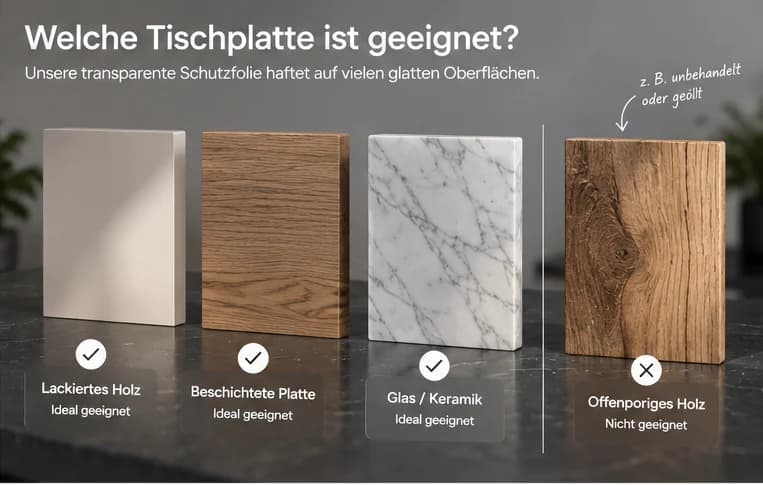
Which table top is suitable?
What matters is how the surface is treated, not the type of wood. Painted, sealed and laminated tops, glass and smooth plastic are suitable – paint protection film for painted furniture is the usual case. Oiled, waxed and open-pored woods are not: the adhesive does not hold across the whole surface there.
- Lacquered woodSuitablePainted fronts, painted table tops, piano lacquerThe film holds on sealed, fully cured lacquer. Let freshly lacquered surfaces cure for at least four weeks.
- Laminated and coated woodSuitableKitchen fronts, melamine and laminate boards, furniture boardsSmooth, sealed coating – the normal case for kitchens and furniture.
- Glass and ceramicsSuitableGlass tables, display cases, tiled splashbacks, glass panelsClean grease-free before applying; glass is unforgiving of dust under the film.
- Smooth plasticsSuitableAcrylic glass, smooth plastic panels, displaysSmooth and sealed. For soft or rubberised plastics, test in a hidden spot first.
- Lightly textured surfacesCheck firstFine wood embossing, soft-touch, fine linen patternWhether the adhesive holds across the surface depends on the texture – we test that on a sample.
- Unknown materialCheck firstNot sure what the surface isA photo and a short description are enough – we will tell you whether and which film fits.
- Oiled or waxed woodNot suitableOiled solid wood tables, waxed frontsOil and wax prevent adhesion. The film comes off – we generally advise against it.
- Open-pored, untreated woodNot suitableRaw wood, coarsely brushed oakThe adhesive finds no sealed surface and does not hold across it.
Not sure about the material? Send a photo.
We help you assess it: a photo of the surface and a detail of the edge, plus what you know about material and treatment. A photo alone does not always decide – if in doubt we test adhesion on a sample.
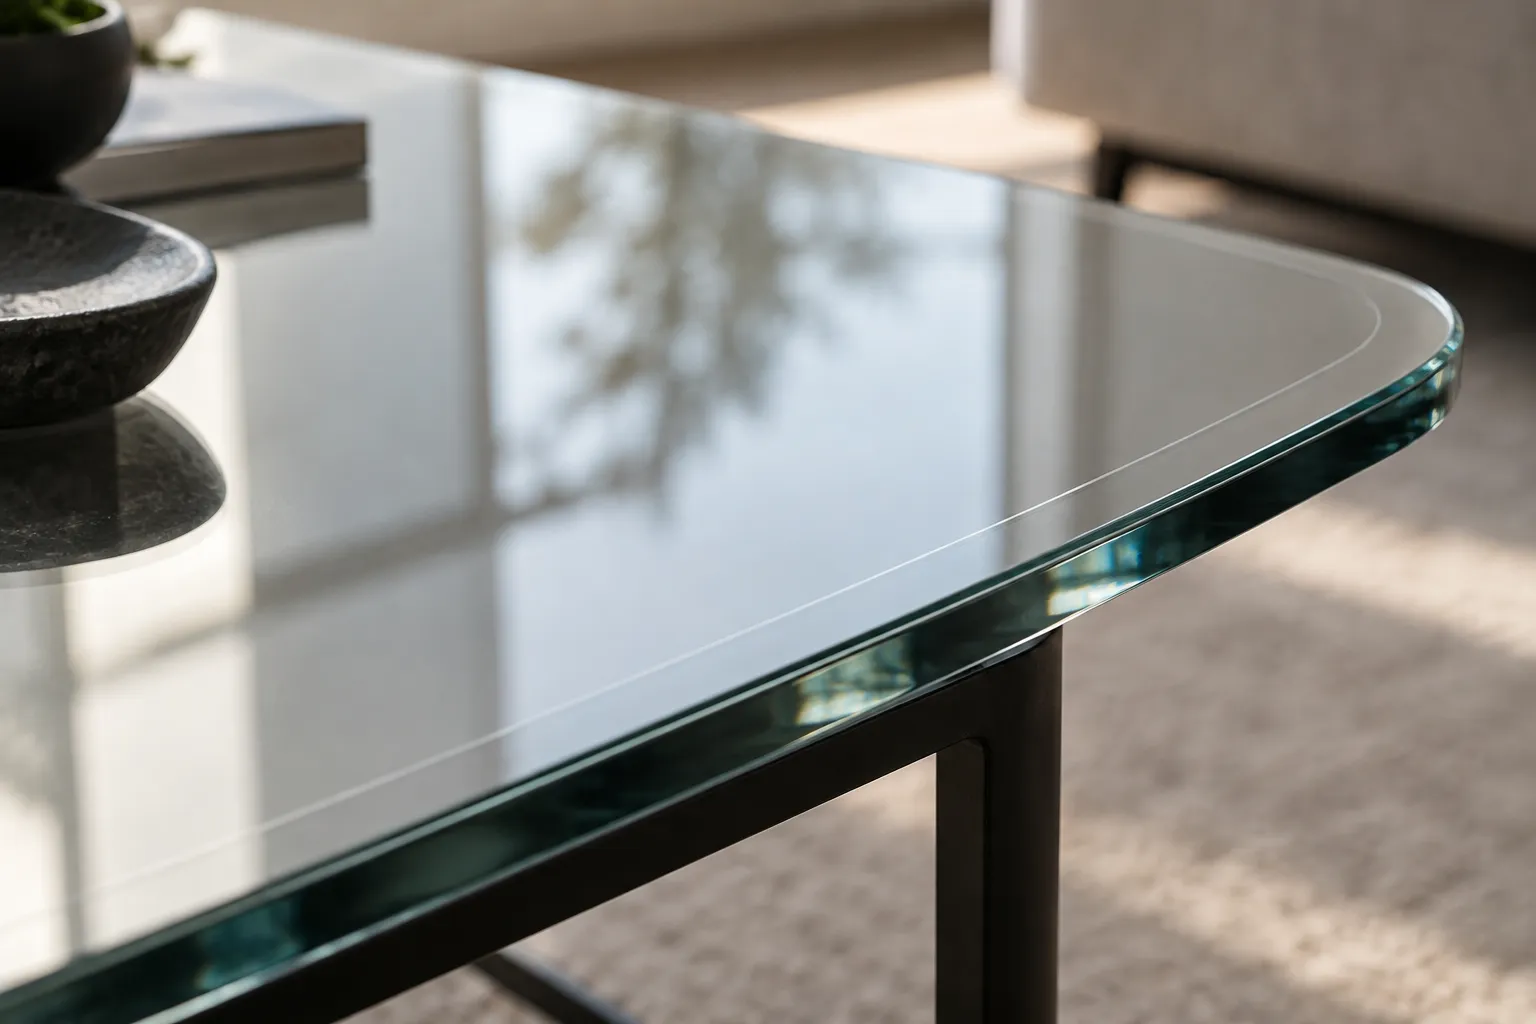
Glass top
Glass is suitable – clean it free of grease, then the film lies flat. It protects the surface against signs of use; it is not a safety or anti-shatter film and does not replace safety glass.
Table and furniture protection film: Clear or Premium Clear?
Both are crystal clear: grain, colour and gloss of the top stay as they are. The difference is how much use they are meant to withstand.
Heavy use
Premium Clear
Thicker carrier layer and a surface in which fine, superficial scratches disappear again – deep cuts do not.
- Dining tablePlates, glasses, keys, homework – the surface that takes the most every day.
- deskLaptop, mouse, mug, watch strap – the same spots, every day.
- Frequently used surfaceKitchen table, workbench in the hobby room, the counter – anything on which something is put down every day.
Normal use
Clear
Crystal clear and the thinnest film in the range – the lowest price per square metre.
- SideboardThe top where keys, vases and bags end up.
- Chest of drawersThe surface on top – painted, laminated or with a glass top.
- Coffee table, shelf, bedside tableSmaller surfaces that are used normally in everyday life – each its own cut.
Do you deliberately want to change the look? Matte, if reflections from lamp and window bother you and the top may look matte – the finish changes visibly. · High Gloss, if a glossier look is deliberately wanted, for example on piano lacquer. If the top should look as before, stay with Clear or Premium Clear. Three questions in the assistant.
Where the film helps
Plates and glasses, laptop and mouse, keys, decorations, stationery – putting things down and moving them every day leaves superficial signs of use. The film takes them instead of the top; the top underneath stays as it is, and the film can be peeled off again later.
No heat protection
Hot pots, pans and baking trays still belong on a trivet – as on the top itself.
Do not cut on it
The film is not a cutting mat: knives and cutters leave cuts that remain – use a board on the dining table and at the work surface.
Simply wipe up spills
Water, coffee, wine: wipe up as on the top itself – soft cloth, water, mild cleaner. No abrasives, no solvents; we do not promise stain resistance.
What shape is your top – and how do you measure it?
You choose the shape in the configurator; each has its own dimension fields and a to-scale preview. The dimension fields are named here as in the configurator; the drawing shows where the tape measure goes.
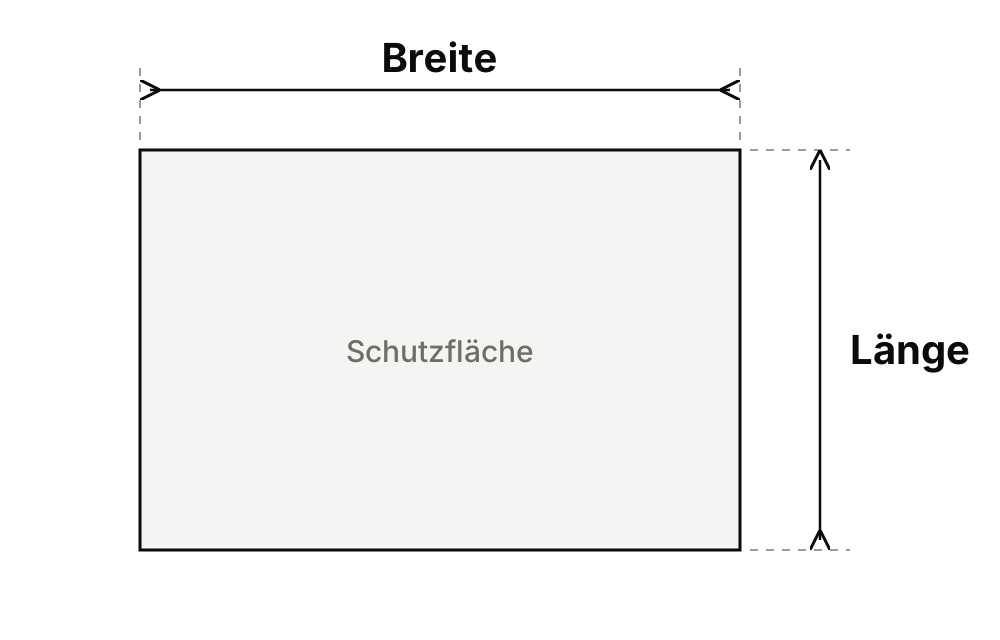
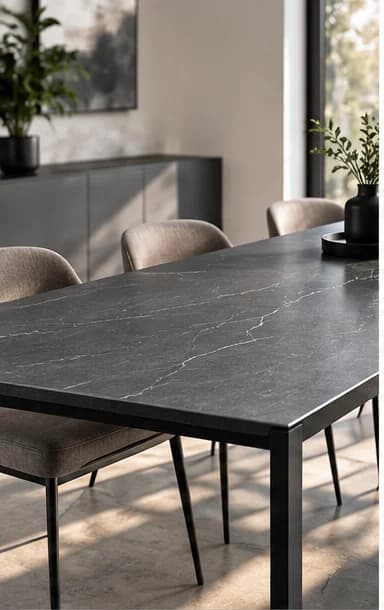
Rectangular table
- Width in cm
- 10–180 cm
- Length in cm
- 10–1000 cm
- 1Measure width and length of the top – in centimetres, accurate to one millimetre.
- 2Measure in several places – furniture is rarely square to the millimetre.
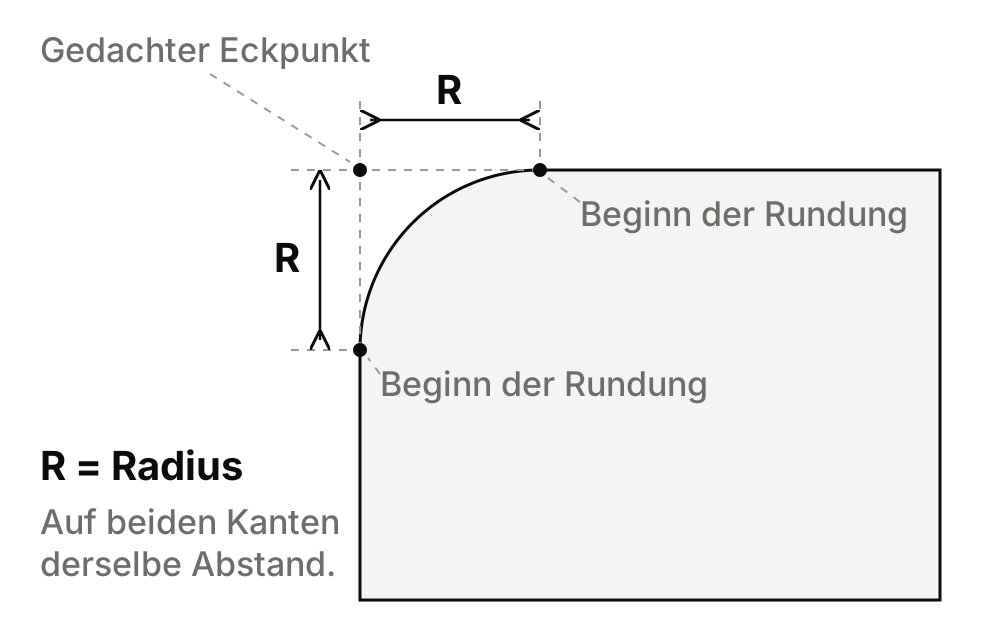
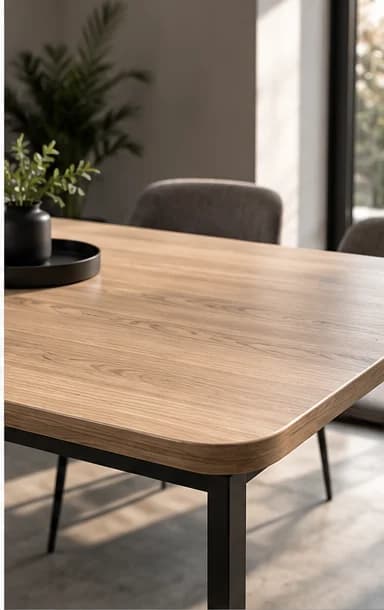
Table with rounded corners
- Width in cm
- 10–180 cm
- Length in cm
- 10–1000 cm
- Corner radius in mm
- 0–200 mm
- 1Width and length as for the rectangle – across the whole top, not just up to the rounding.
- 2Corner radius: mentally extend the two straight edges to the corner point and measure from there to where the rounding begins – in millimetres, the same distance on both edges.
Configure: Rounded cornersYou don’t know your radius?
- Coin or glass: find a round object that fits the rounding exactly and measure its diameter – half the diameter is the radius.
- Test template: enter the radius in the configurator, print the template at 1:1 and hold it against the corner. If it doesn’t fit, change the value and print again.
- Do not estimate from a photo. With “Exactly to size” we cut exactly this radius – a guessed value is a cut that does not fit.
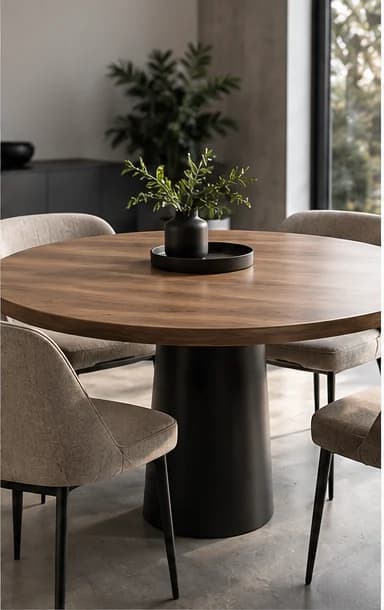
Round table
- Diameter in cm
- 10–180 cm
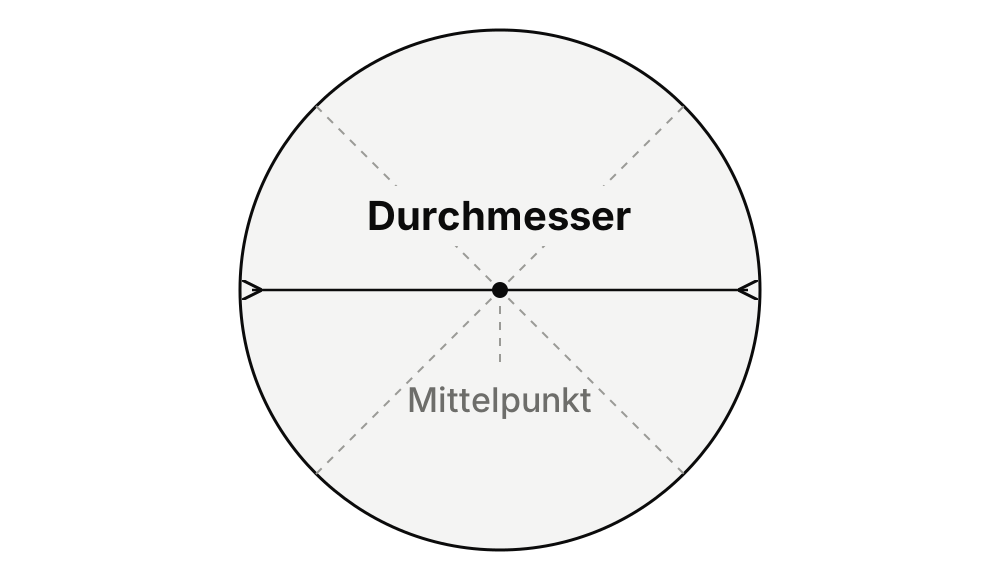
- 1Measure the diameter: from edge to edge through the centre – not the radius.
- 2Check in two or three directions. If the values are the same, it is a circle; if they differ, it is an oval.
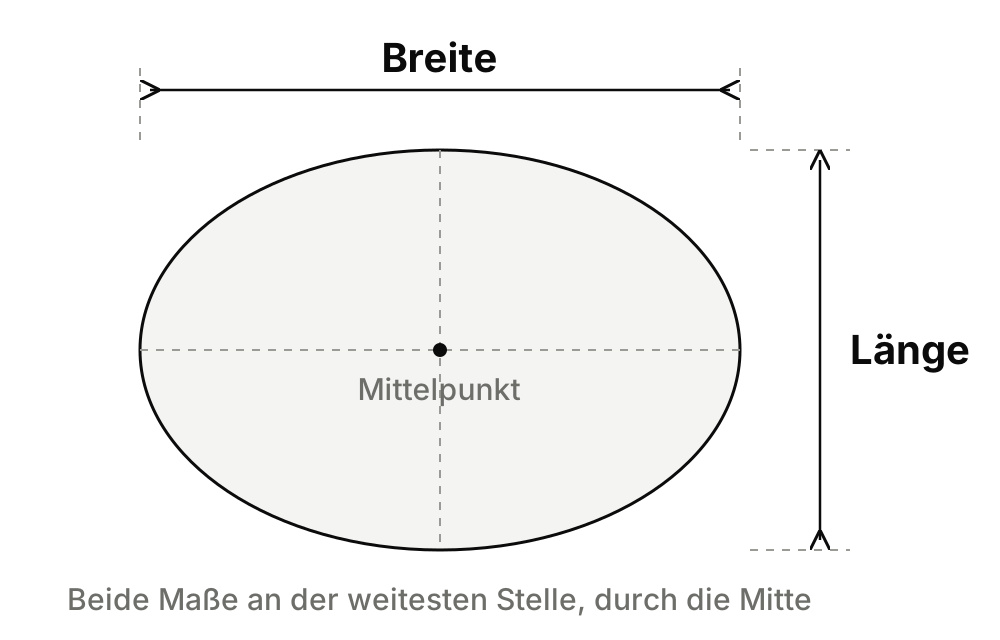
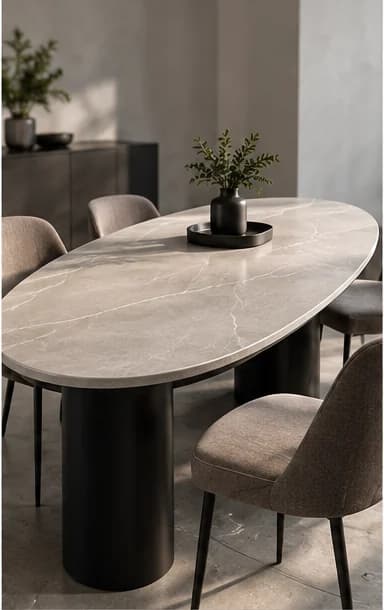
Oval table
- Width in cm
- 10–180 cm
- Length in cm
- 10–1000 cm
- 1Measure the width at the widest point and the length at the longest point – both through the centre.
- 2That is all it takes: we calculate the contour from the two dimensions. If your top is not an even oval, better print the test template or send a photo.
The drawings explain measuring; they are not to-scale templates. Smallest dimension per side 10 cm. Detailed measuring guide
Lay it on before ordering: the 1:1 test template
In the configurator every shape has the test template as a PDF – the contour of your dimensions, spread over A4 pages. Especially with rounded corners, circle and oval it shows before you order whether the dimensions are right.
- 1Enter shape and dimensions in the configurator, load the “1:1 test template”.
- 2Print at “Actual size” or 100 % – not “Fit to page”.
- 3Check the control dimension: the check square on the cover sheet must be exactly 10 × 10 cm.
- 4Tape the pages together according to the plan, cut out, lay on the top and check the corners at the furniture edge.
Avoiding measuring mistakes
- Always measure the actual top – not the manufacturer’s dimension from the product description. Nominal figures and the real surface often differ by millimetres.
- Measure on site, not from old furniture plans or drawings – the surface you cover is the one that counts.
Allowance: with “Cut it yourself” an allowance of one centimetre helps, which you trim off on site. With “Exactly to size” we cut exactly the dimensions entered – the measured dimensions are the final dimensions.
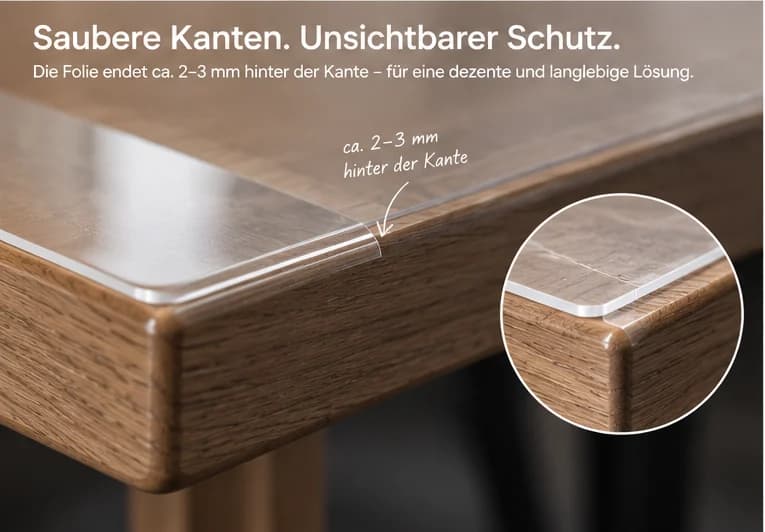
Where does the film end at the table edge?
Flush or 2–3 mm behind the edge – set back, it is least noticeable.
Top only or with the edge?
You order the protection for the top: a flat cut in the dimensions of the top. The edge of the film sits at the table edge – or two to three millimetres behind it, then it is even less noticeable and the edge of the top stays free.
You set the gap when measuring: with “Exactly to size” your dimensions are the final dimensions – for 2–3 mm all round, subtract 4–6 mm from width, length or diameter. With “Cut it yourself” you cut the edge on site.
Wrapping around the edge is the exception, not the rule: it works with heat from a hair dryer, most likely with the thin Clear on soft roundings – not on sharp edges and profiled mouldings. If you plan this, ask beforehand with a photo of the edge.
- FlushFilm ends exactly at the table edge.
- Slightly set back2–3 mm behind the edge – the least noticeable option.
- Around the edgeOnly with heat and on soft roundings – ask beforehand.
Table protection film made to measure: how large may the table be?
- Shorter side, diameter or width of the oval
- up to 180 cm
- Longer side
- up to 1000 cm
- Corner radius
- up to 200 mm
180 cm is the roll width. If a rectangular table is wider, the configurator converts the surface into strips – side by side with 2 cm overlap, the seam at a joint – and adds them to the cart together. Round and oval tops over 180 cm cannot be cut from one piece.
Is your table particularly large or does it have a special shape?
A photo and the dimensions are enough – we tell you whether and how the surface can be covered before you order anything.
Send photo and dimensionsExamples for measuring
Dimensions as they occur – not a standard and not a recommendation: each card opens the configurator with shape, dimensions and film; you enter your own dimensions and see area and price instantly.
- Desk 60 × 120 cmfrom €72.00 · Premium Clear, cut it yourselfOpen in the configurator →
- Dining table 90 × 180 cm, radius 20 mmfrom €161.97 · Premium Clear, cut it yourselfOpen in the configurator →
- Side table Ø 50 cmfrom €19.63 · Premium Clear, cut it yourselfOpen in the configurator →
- Oval table 100 × 200 cmfrom €157.08 · Premium Clear, cut it yourselfOpen in the configurator →
Several pieces of furniture in one order
You configure the surfaces one after another – dining table, sideboard, desk – and order them together. After “Add to cart”, “Configure another cut” takes you straight to the next one.
- Name each cut in the “Label” field, e.g. dining table, desk, sideboard – that is how it appears in the cart and on the packing slip.
- Identical pieces – two identical side tables, for example – you order as a quantity: configure once, quantity 2. Each piece comes separately.
Installation on tables and furniture
- 1Clean the surface and let it dry
- 2Align the film wet
- 3Squeegee from the centre outwards
- 4Check the edges, let cure for 24 hours
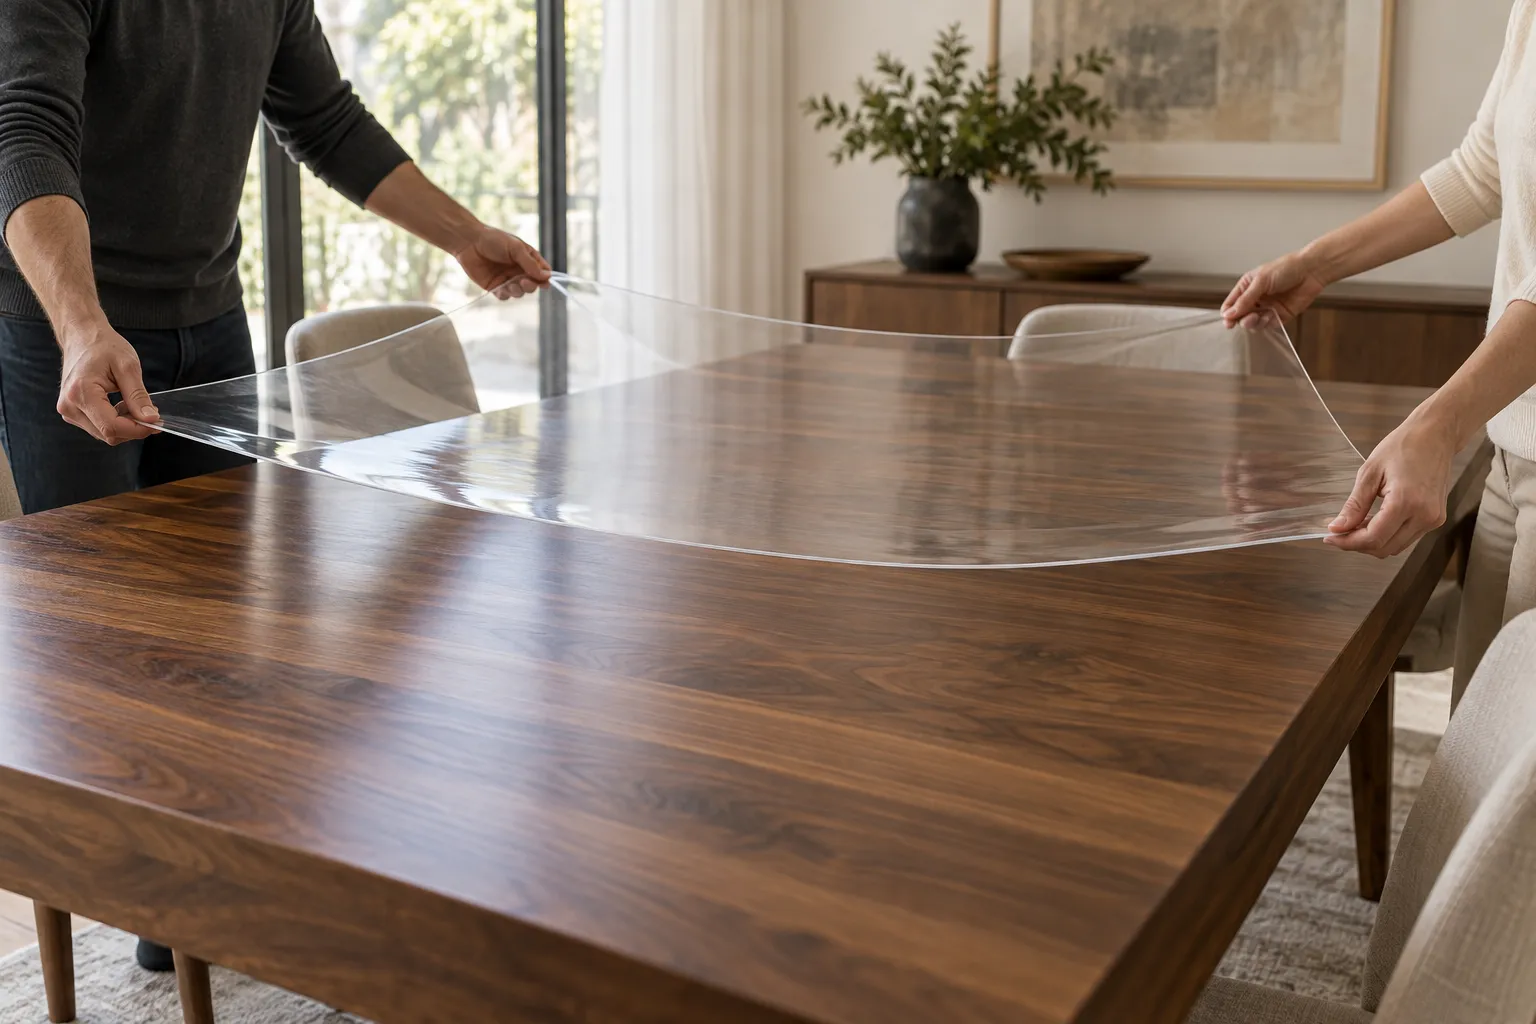
With large dining tables a second person helps – to hold and align the piece of film.
No installation tools yet?
Squeegee with felt edge, spray bottle, cloth and cutter – the Application Kit is enough for several applications. If you already have the tools, order the film on its own.
Table cover or protective film? The difference
A “table cover” is usually a loose table mat: a transparent sheet, a few millimetres thick, that is laid on the table. Our protective film is something else – a self-adhesive piece cut to the dimensions of your top that adheres to it.
- Application
- Loose table matIs laid on and lies loosely on the top.
- Self-adhesive protective filmIs positioned wet, squeegeed out and adheres to the top.
- Thickness
- Loose table matA few millimetres.
- Self-adhesive protective filmFractions of a millimetre:Clear 0.15 mmPremium Clear 0.18 mm
- Look
- Loose table matA visible second layer with its own edge above the top.
- Self-adhesive protective filmCrystal clear directly on the surface, with no second layer above the top.
- Surface
- Loose table matDoes not stick – so it also lies on oiled or raw wood.
- Self-adhesive protective filmOnly smooth, sealed surfaces: painted, sealed, laminated, glass. Not on oiled, waxed or raw wood.
- Removal
- Loose table matLift off at any time, for example to clean.
- Self-adhesive protective filmStays on the top; can be peeled off again slowly and flat.
Protective film if …
the top is smooth and sealed and the table should look as it does without a cover – permanently, without anything slipping.
Loose mat if …
the top is oiled, waxed or raw, or you only need the protection temporarily and want to take it off again and again.
Questions about tables and furniture
Which table surfaces are suitable?+
Smooth, sealed surfaces: painted and sealed tops, laminated and coated furniture panels, glass and smooth plastic. Not suitable are oiled, waxed and raw, open-pored woods – the adhesive does not hold across the whole surface there. We test slightly textured surfaces on a sample.
Table cover or protective film – what is the difference?+
A table cover in the sense of a loose table mat is a few millimetres thick and is simply laid on; you can take it off at any time, and it also lies on oiled wood. Our protective film is a self-adhesive cut piece, fractions of a millimetre thick, that adheres crystal clear to the top – without a second layer and without slipping. For that it needs a smooth, sealed surface: painted, sealed, laminated or glass, not oiled, waxed or raw.
Clear or Premium Clear for my table?+
Premium Clear for dining table and desk – the surfaces that are used hard every day. Clear for sideboard, chest of drawers, coffee table and shelf, which take less. Both are crystal clear and leave the look of the top as it is. Matte only if reflections bother you and the top may look matte.
How do I measure a round table?+
The diameter: from edge to edge through the centre, in centimetres, accurate to one millimetre – not the radius. Measure in two or three directions; if the values are the same, it is a circle; if they differ, choose “Oval” and enter width and length at the widest point.
How do I determine the corner radius?+
Mentally extend the two straight edges to their corner point and measure from there to where the rounding begins – in millimetres, the same distance on both edges. Alternatively, find a round object that fits the rounding exactly: half its diameter is the radius. Do not estimate – the 1:1 test template from the configurator shows before you order whether the value is right.
Can I use the film on oiled wood?+
No. Oil and wax prevent adhesion, the film comes off – we generally advise against it. What matters is the surface treatment, not the type of wood: a painted or sealed top made of the same wood is suitable. If you are unsure what your top is, send us a photo.
Can the film withstand hot pots?+
No, the film is not heat protection. Hot pots, pans and baking trays still belong on a trivet – as on the top itself.
What do I do with very large tables?+
The shorter side may be at most as wide as the roll; the longer side is free up to the maximum length; the values are shown at the field in the configurator. If a rectangular table is wider, the configurator suggests strips with overlap that you order together. For round and oval tops wider than the roll and for special shapes, send us a photo and the dimensions – we tell you beforehand what is possible.
Shipping, price and installation under Frequently asked questions.
Dimensions already taken?
Choose your shape, enter your dimensions and configure the matching cut.